
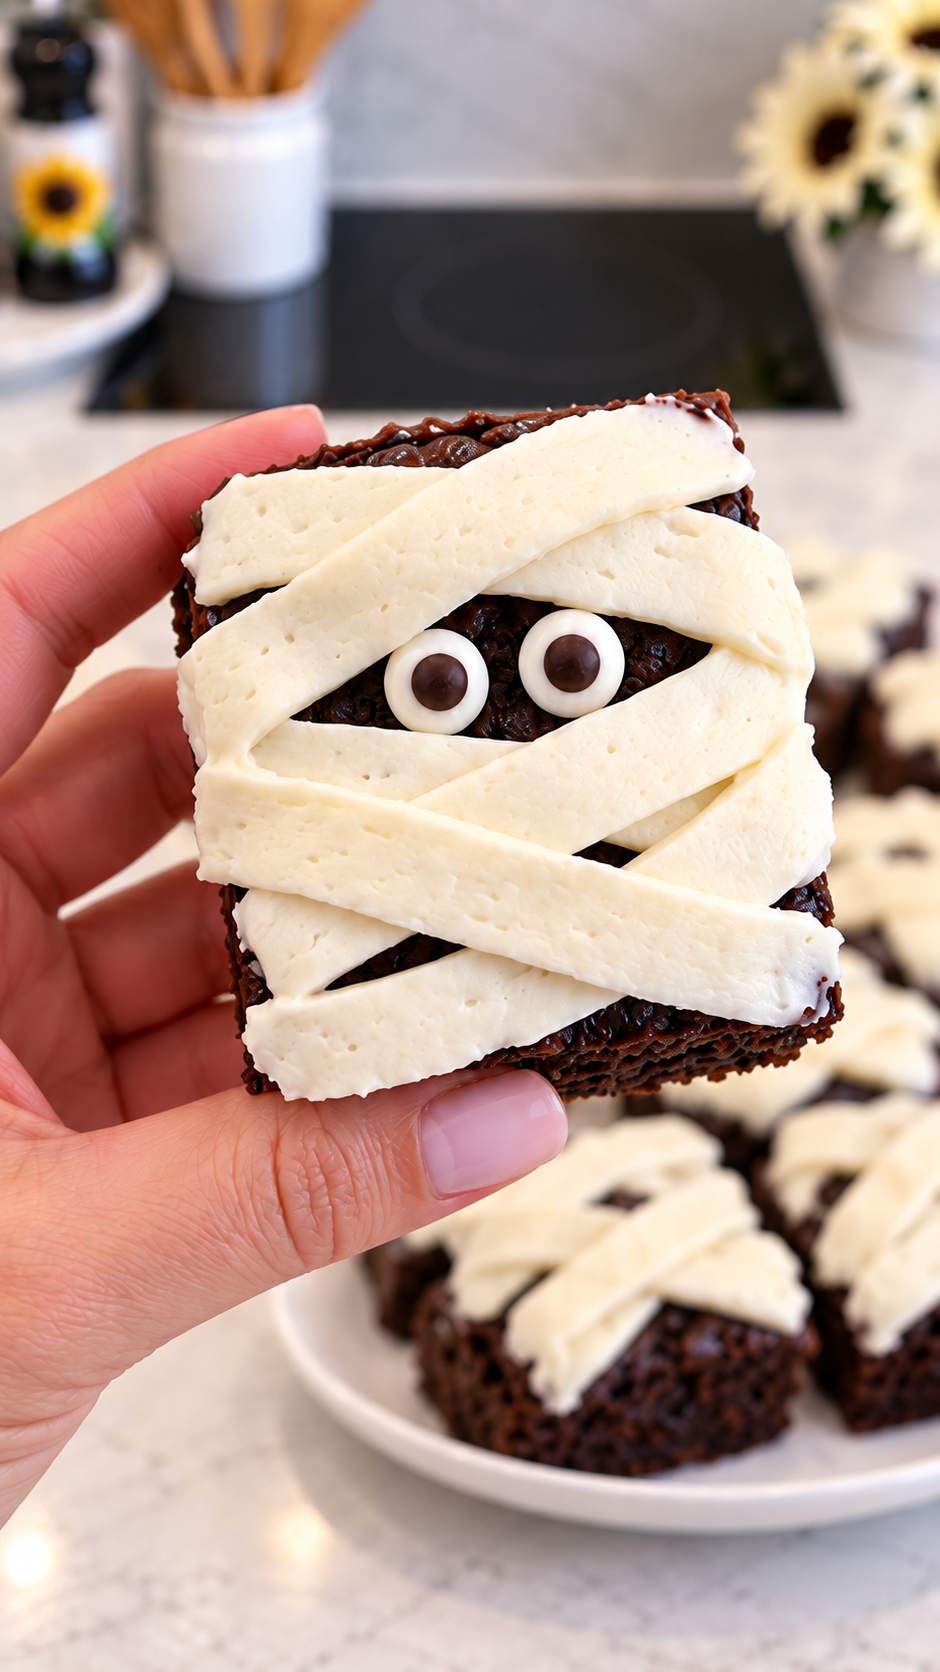
These Mummy Brownies turn rich, fudgy brownie squares into an easy Halloween dessert with fluffy vanilla buttercream bandages and playful candy eyes. They look impressive on a party platter, but the decorating technique is simple enough for beginners and fun for kids to help with.
You can use your favorite homemade brownie recipe or save time with a boxed mix. The most important step is allowing the brownies to cool completely before adding the buttercream. Once chilled and cut into neat squares, each brownie becomes a tiny mummy in just a few minutes.
Why You’ll Love These Mummy Brownies
- Perfect for Halloween: The candy eyes and piped bandages create an instantly recognizable spooky treat.
- Easy to customize: Use homemade brownies, a boxed mix, or your favorite bakery-style brownie recipe.
- Make-ahead friendly: Bake the brownies one day ahead and decorate them before the party.
- Great for parties: The individual squares are easy to serve at classroom events, Halloween dinners, and dessert tables.
Ingredients
- 1 batch baked brownies, completely cooled
- 1/2 cup (115 g) unsalted butter, softened
- 1 1/2 cups (180 g) powdered sugar
- 1 teaspoon vanilla extract
- 1–2 tablespoons milk, as needed
- 18 candy eyes
How to Make Mummy Brownies
1. Bake and Cut the Brownies
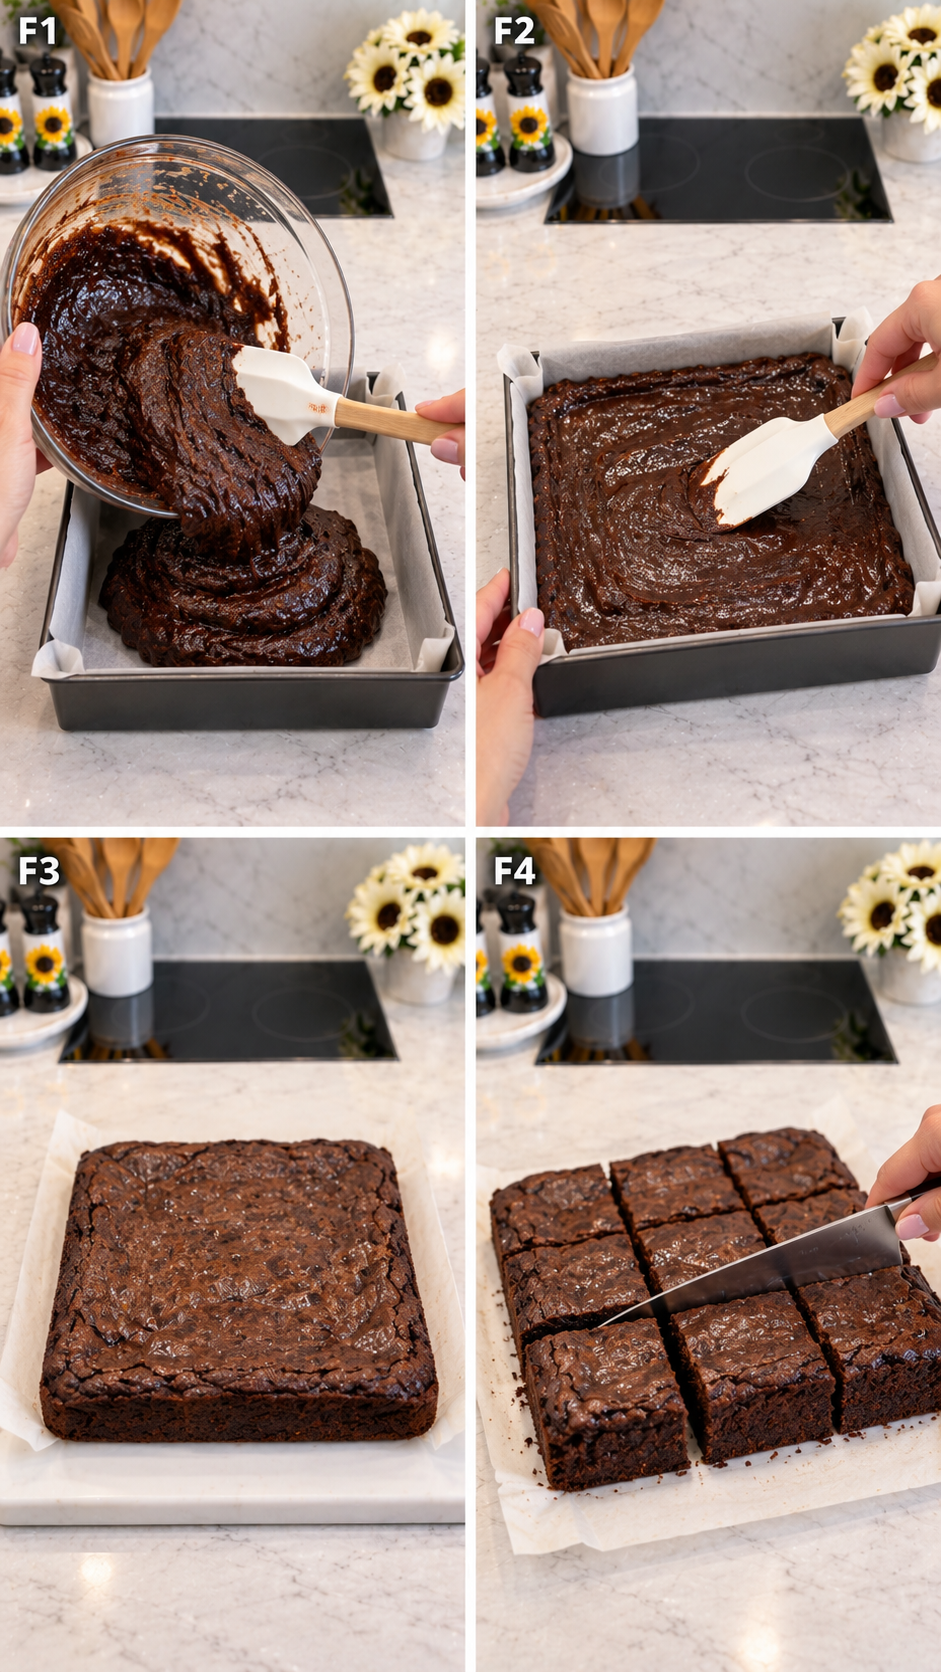
Bake the brownies in a parchment-lined 8-inch (20 cm) square pan according to your chosen recipe. Let them cool completely in the pan. Use the parchment to lift the slab onto a cutting board, then cut it into 9 equal squares. For the cleanest edges, wipe the knife between cuts.
2. Prepare the Vanilla Buttercream
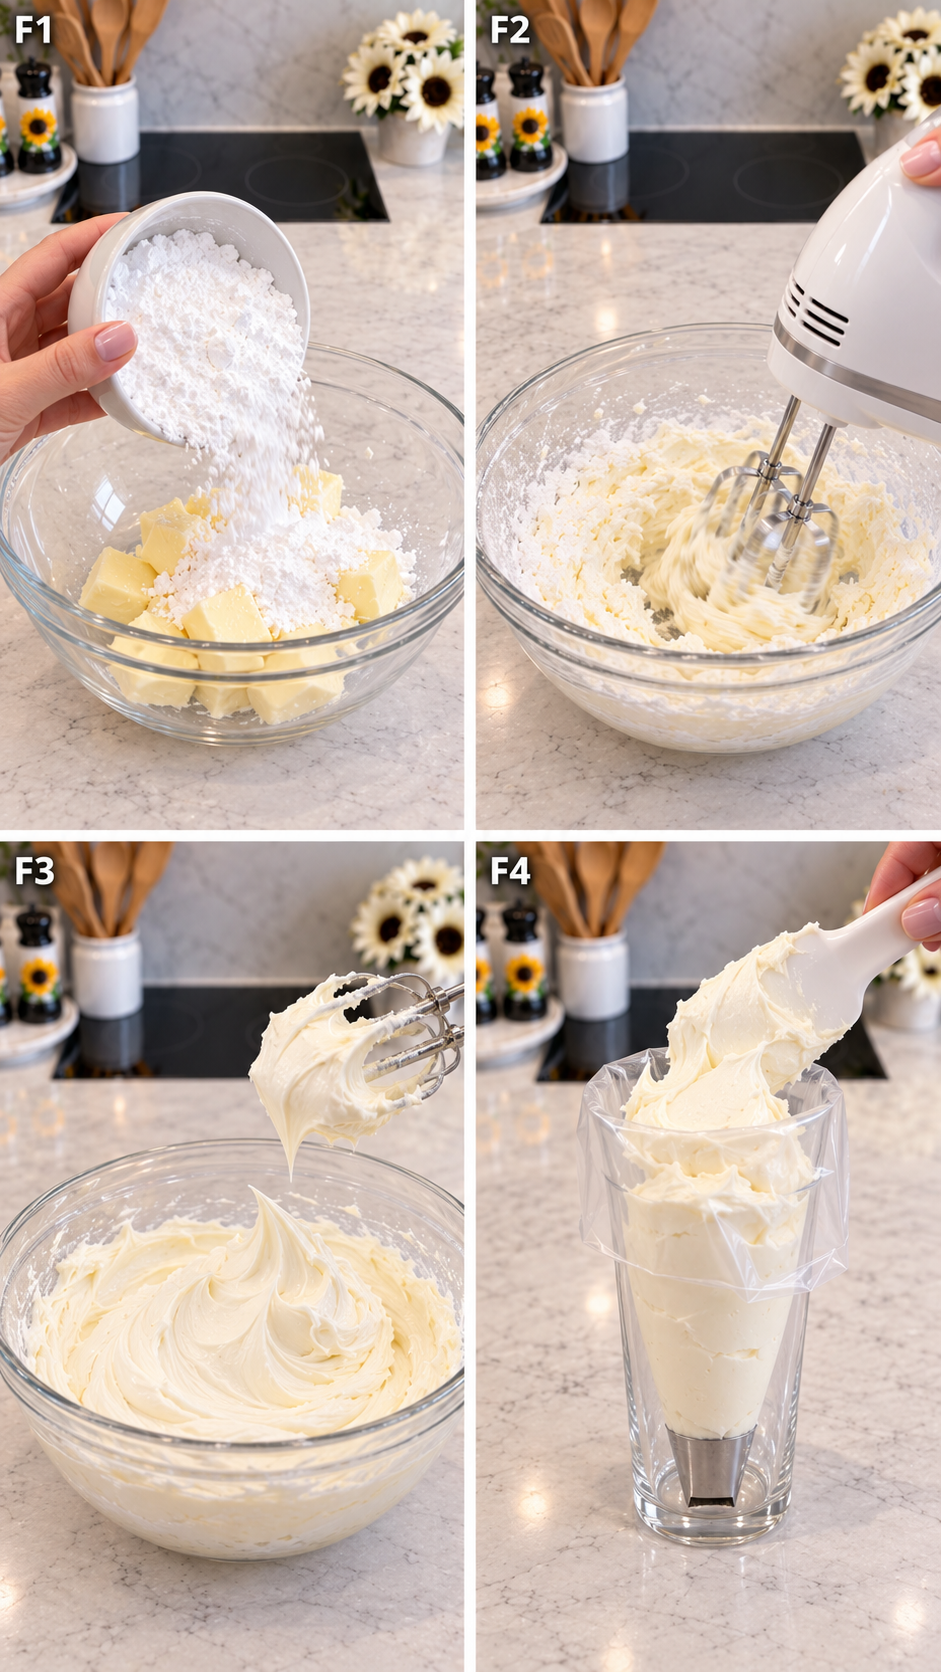
Beat the softened butter, powdered sugar, and vanilla until smooth and fluffy. Add the milk gradually, one teaspoon at a time, until the frosting is thick but easy to pipe. Transfer the buttercream to a piping bag fitted with a wide, flat ribbon tip.
3. Add the Eyes and Pipe the Bandages
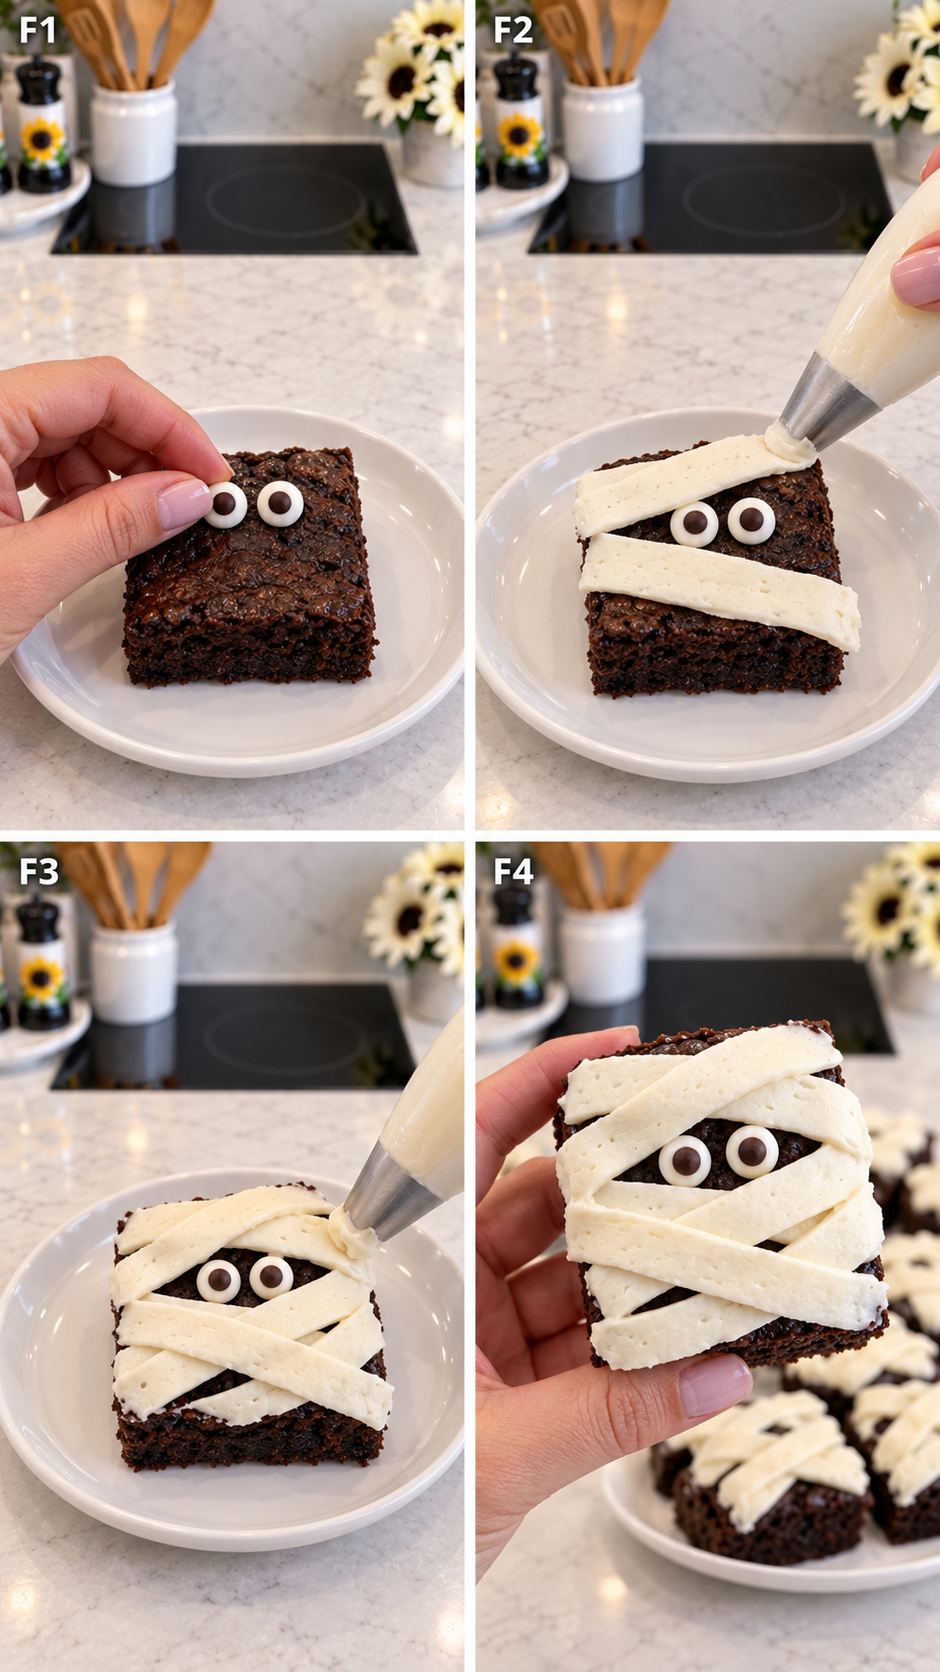
Place two candy eyes near the upper center of each brownie. Pipe thick buttercream ribbons diagonally across the surface, changing direction as you work to create overlapping mummy bandages. Leave a small opening around the eyes so every mummy has its own expression.
Tips for the Best Mummy Brownies
- Cool completely: Warm brownies will melt the buttercream and make the bandages slide.
- Use a thick frosting: The buttercream should hold a clean ribbon shape. Add more powdered sugar if it feels too soft.
- Chill before cutting: Refrigerating the brownie slab for 20–30 minutes helps produce tidy squares.
- Change the bandage pattern: Pipe every mummy differently for a playful homemade look.
- Add eyes first: This makes it easier to keep the faces visible while piping.
Make Ahead and Storage
The undecorated brownies can be baked up to two days ahead and kept in an airtight container. Decorated mummy brownies can be refrigerated for up to four days. Bring them to room temperature for about 20 minutes before serving so the brownies soften and the buttercream tastes creamy. If you need to stack them, place parchment between the layers and avoid pressing on the frosting.
Frequently Asked Questions
Can I use a boxed brownie mix?
Yes. Prepare and bake the mix in an 8-inch square pan, then cool it completely before decorating.
What can I use instead of candy eyes?
Pipe small dots of melted white chocolate and add a tiny dark chocolate center, or use small white candies with chocolate dots.
Can I use cream cheese frosting?
You can, but make it thick enough to hold the ribbon shape and keep the decorated brownies refrigerated.
Mummy Brownies Recipe Card
Yield: 9 brownies | Prep: 25 minutes | Bake: According to brownie recipe | Total: About 1 hour 30 minutes
Ingredients
- 1 batch baked brownies, completely cooled
- 1/2 cup (115 g) unsalted butter, softened
- 1 1/2 cups (180 g) powdered sugar
- 1 teaspoon vanilla extract
- 1–2 tablespoons milk, as needed
- 18 candy eyes
Instructions
- Bake the brownies in a parchment-lined 8-inch (20 cm) square pan and cool completely.
- Lift the brownie slab from the pan and cut it into 9 equal squares.
- Beat the butter, powdered sugar, and vanilla until fluffy. Add milk gradually until thick and pipeable.
- Transfer the buttercream to a piping bag fitted with a wide flat ribbon tip.
- Place two candy eyes near the upper center of each brownie.
- Pipe buttercream ribbons diagonally in alternating directions, keeping the eyes visible.
- Arrange on a serving platter and enjoy.
Note: Store decorated brownies in an airtight container in the refrigerator for up to 4 days.