
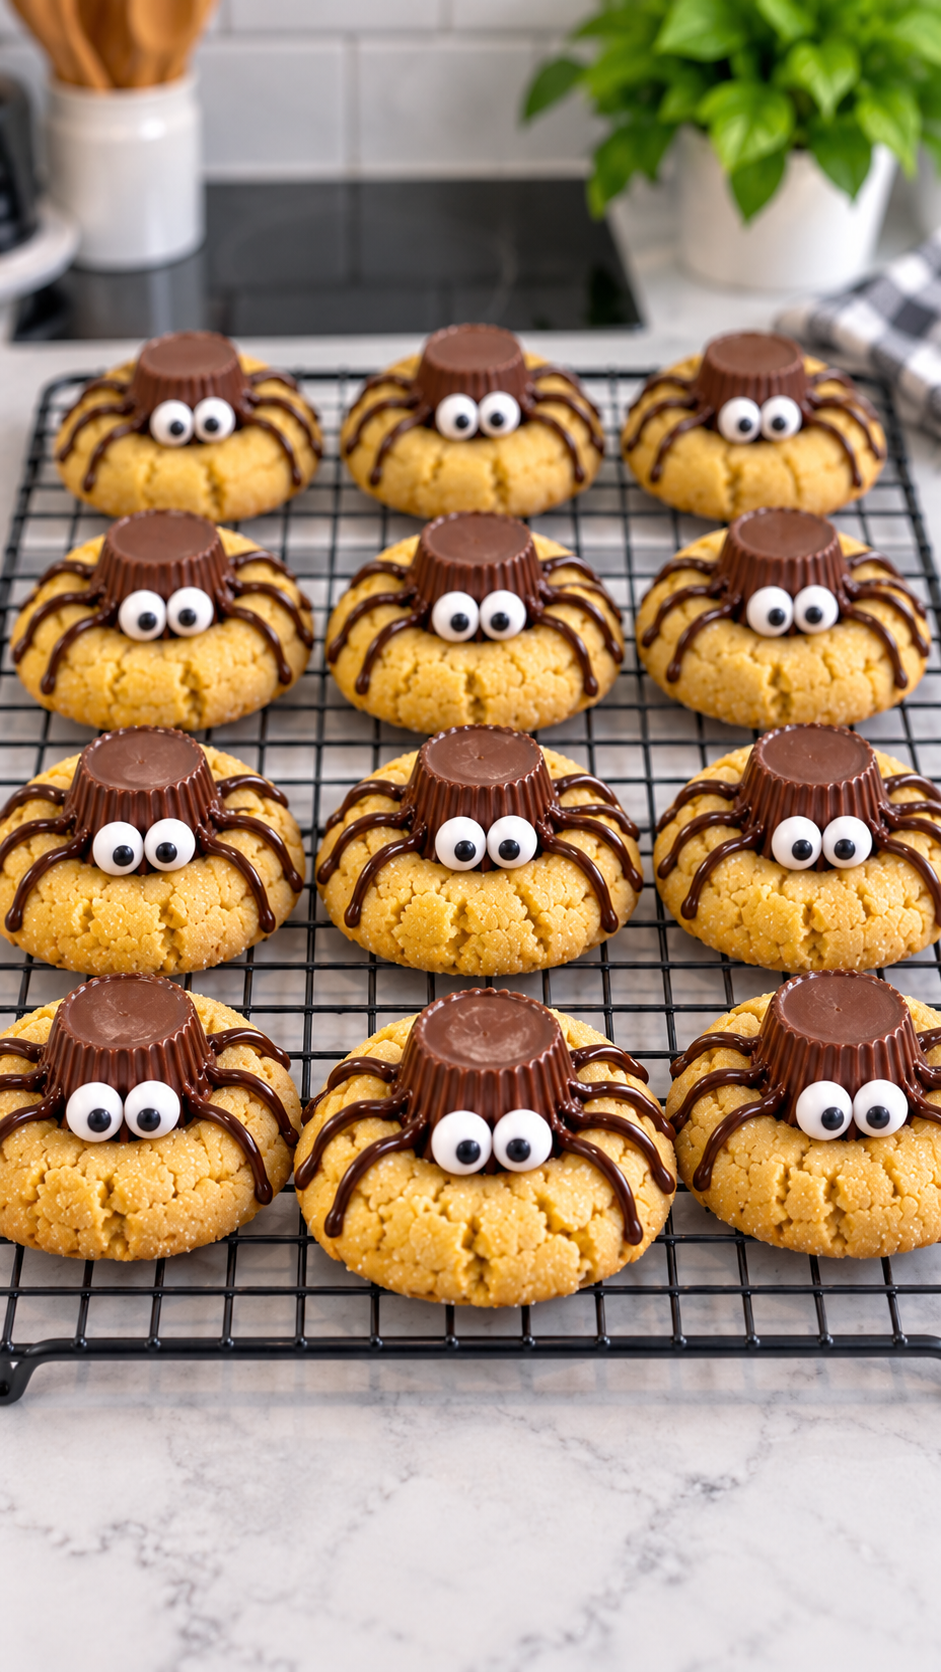
Peanut Butter Spider Cookies are soft, chewy Halloween treats topped with miniature chocolate peanut-butter cups, candy eyes, and piped chocolate legs. The cookies have crisp sugared edges, tender centers, and the irresistible combination of peanut butter and chocolate.
Despite their playful bakery-style appearance, these spider cookies are simple to assemble. The warm cookie holds the chocolate cup in place, tiny dabs of melted chocolate secure the eyes, and a piping bag creates eight quick legs. They are perfect for Halloween parties, classroom celebrations, autumn bake sales, or a spooky family baking afternoon.
Why You’ll Love These Spider Cookies
- Soft peanut butter cookies pair perfectly with chocolate candy.
- The sugar coating gives every cookie a delicate sparkle and light crunch.
- No special cookie cutter or complicated decorating technique is needed.
- Each spider has a cute personality that children love.
- The recipe makes 24 cookies, so it is ideal for parties and sharing.
Ingredients
- 1/2 cup unsalted butter, softened
- 1/2 cup creamy peanut butter
- 1/2 cup granulated sugar
- 1/2 cup packed light brown sugar
- 1 large egg
- 1 teaspoon vanilla extract
- 1 1/4 cups all-purpose flour
- 1/2 teaspoon baking soda
- 1/4 teaspoon fine salt
- 1/3 cup granulated sugar, for rolling
- 24 miniature chocolate peanut-butter cups, unwrapped
- 48 small candy eyeballs
- 4 ounces semisweet chocolate, melted
How to Make Peanut Butter Spider Cookies
1. Make the Peanut Butter Dough
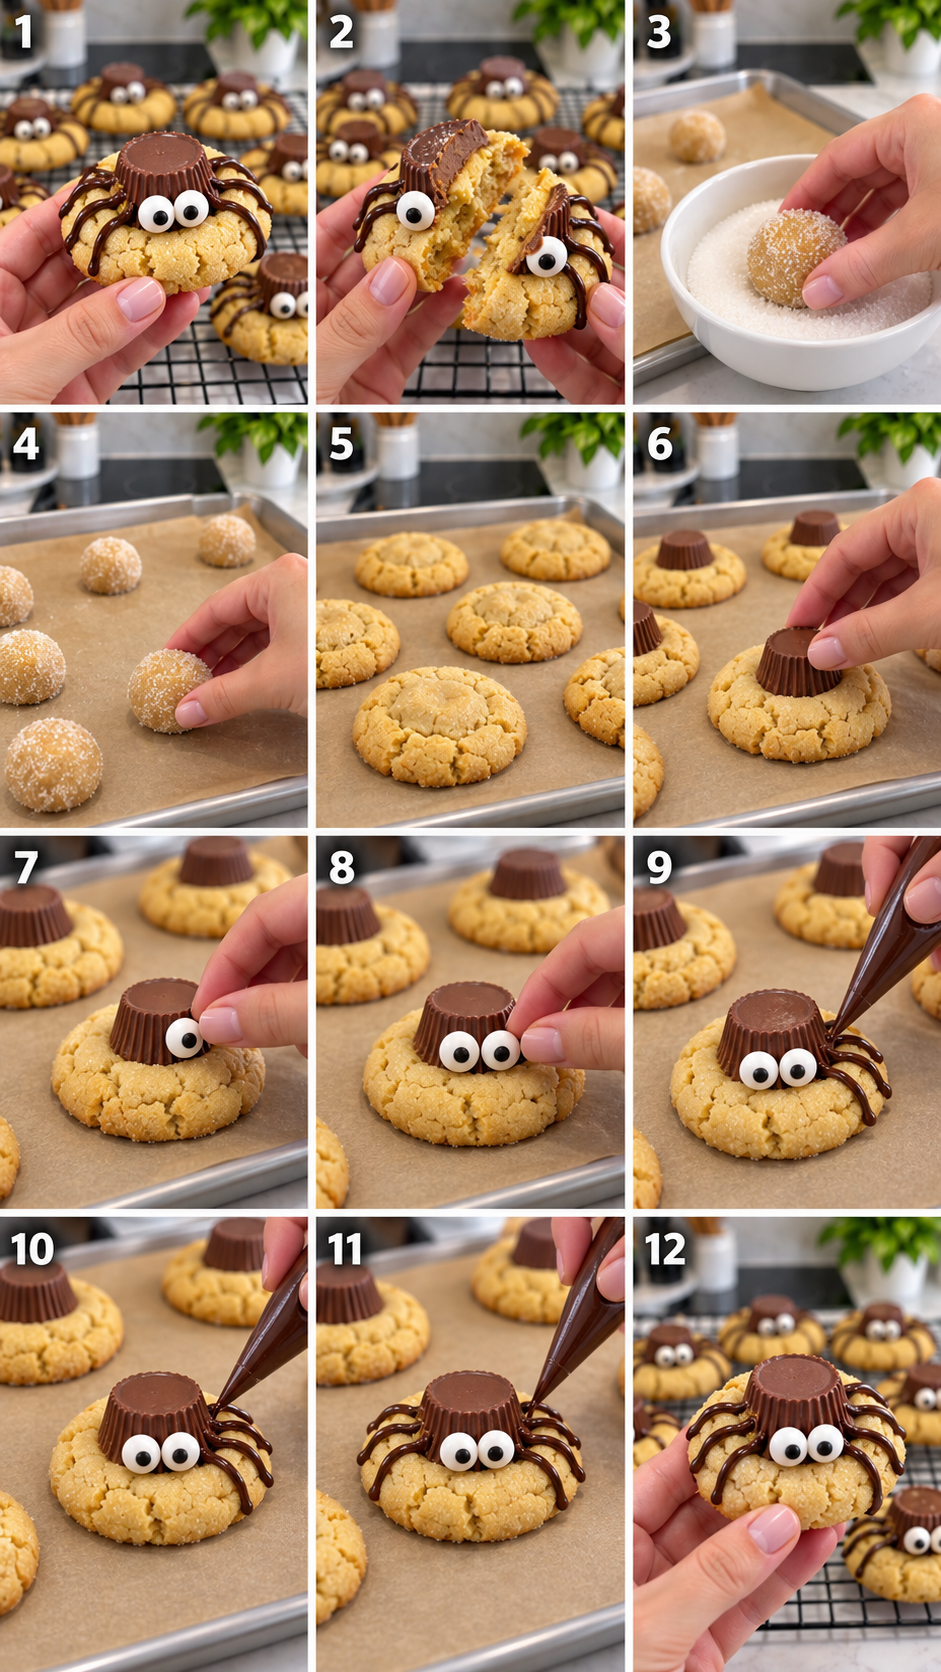
Heat the oven to 350°F and line two baking sheets with parchment paper. Beat the softened butter, creamy peanut butter, granulated sugar, and brown sugar until smooth and creamy. Mix in the egg and vanilla. In a separate bowl, whisk the flour, baking soda, and salt. Add the dry ingredients to the peanut-butter mixture and mix only until a soft dough forms.
2. Shape, Roll, and Bake
Divide the dough into 24 walnut-sized portions. Roll each portion into a smooth ball, then coat it completely in the extra granulated sugar. Arrange the balls about 2 inches apart on the prepared baking sheets. Bake for 9 to 11 minutes, until the edges look lightly set while the centers remain soft. Avoid overbaking because the cookies continue to firm as they cool.
3. Add the Chocolate Spider Bodies
As soon as the cookies leave the oven, press one unwrapped miniature chocolate peanut-butter cup upside down into the center of each warm cookie. Press gently so the candy is anchored without cracking the cookie. Let the cookies cool on the pan for about 5 minutes, then move them carefully to a wire rack.
4. Attach the Eyes and Pipe the Legs
Use a tiny dab of melted semisweet chocolate to attach two candy eyeballs to the front of every chocolate cup. Transfer the remaining melted chocolate to a small piping bag with a very fine opening. Pipe four bent legs on the left and four on the right of each spider body. Let the chocolate set completely before stacking or serving the cookies.
Helpful Tips
- Use creamy peanut butter: Standard creamy peanut butter gives the dough the most reliable structure.
- Unwrap the candy first: Have all 24 cups ready before the cookies come out of the oven.
- Keep the centers soft: Slightly underbaked centers create the best chewy texture.
- Let the candy cool: The chocolate cups may soften on the warm cookies, so avoid touching them.
- Use a tiny piping opening: Thin chocolate lines create neat, curved spider legs.
Storage and Make-Ahead Instructions
Store the finished cookies in a single layer in an airtight container at room temperature for up to four days. Place parchment between layers only after the chocolate legs are completely firm. The undecorated peanut butter cookies can be frozen for up to two months. Thaw them at room temperature, then attach the candy bodies and decorations with melted chocolate.
Frequently Asked Questions
Can I use natural peanut butter?
Natural peanut butter can separate and make the dough oily or crumbly. For consistent results, use a smooth conventional peanut butter that does not require stirring.
How do I keep the chocolate cups from melting?
Press them into the cookies immediately so they adhere, then leave the cookies undisturbed. Moving the tray to a cool room helps the candy set again without losing its shape.
Can I prepare the dough in advance?
Yes. Refrigerate the covered dough for up to 48 hours. Let it soften briefly, then roll the portions in sugar and bake as directed.
Peanut Butter Spider Cookies Recipe
Chewy peanut butter cookies topped with chocolate candy bodies, candy eyes, and eight piped chocolate legs.
Prep Time: 25 minutes | Bake Time: 9–11 minutes | Yield: 24 cookies
Ingredients
- 1/2 cup each softened butter, creamy peanut butter, granulated sugar, and brown sugar
- 1 egg and 1 teaspoon vanilla
- 1 1/4 cups flour, 1/2 teaspoon baking soda, and 1/4 teaspoon salt
- 1/3 cup sugar for rolling
- 24 miniature chocolate peanut-butter cups
- 48 candy eyeballs
- 4 ounces melted semisweet chocolate
Instructions
- Mix the cookie dough and shape it into 24 balls.
- Roll in sugar and bake at 350°F for 9–11 minutes.
- Press one upside-down chocolate cup into each warm cookie.
- Attach two candy eyes and pipe four chocolate legs on each side.
- Let the chocolate set completely before serving.
Tip: Unwrap the chocolate cups before baking so you can press them into the cookies immediately.