
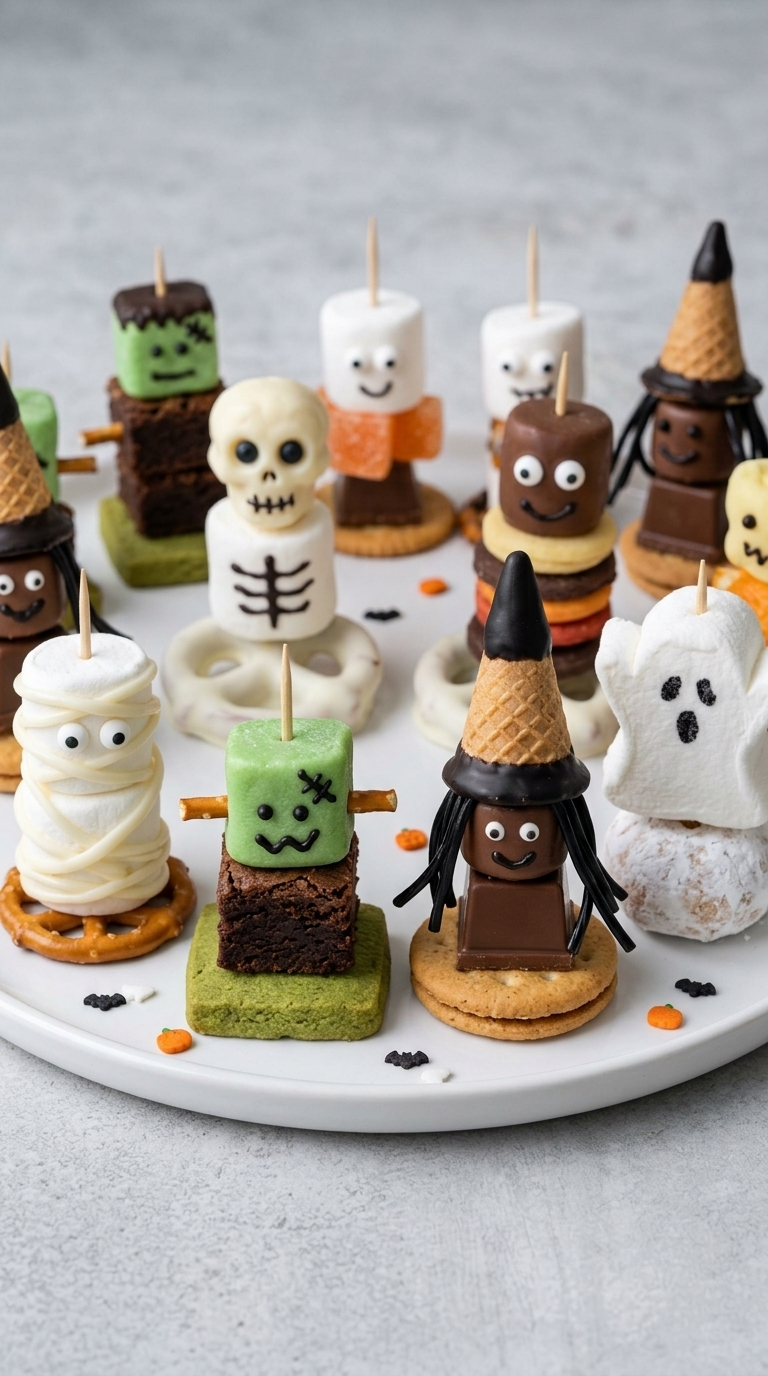
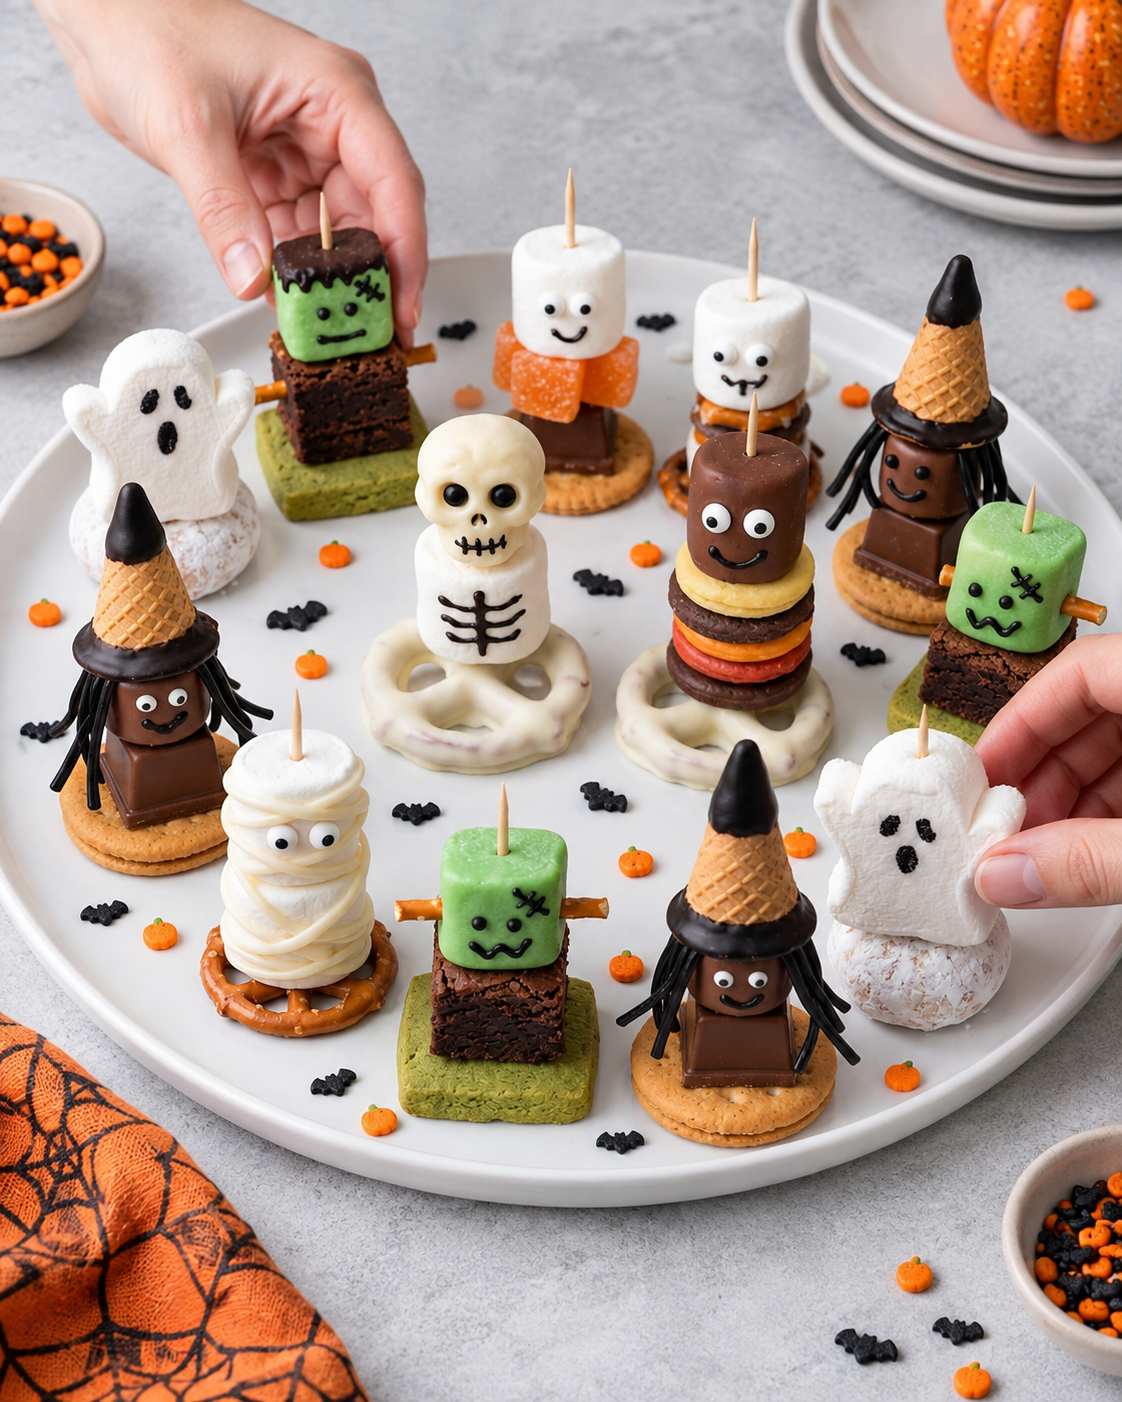
This Halloween Dessert Platter brings an entire friendly monster crew to the party. Marshmallow mummies, brownie Frankensteins, chocolate witches, skeletons, and smiling ghosts are arranged together on one festive tray filled with playful edible details.
Every character starts with familiar store-bought treats, so you can create an impressive Halloween centerpiece without complicated baking. Make all five designs for a dramatic party platter, or choose two or three favorites for a smaller family celebration.
Why You’ll Love This Halloween Dessert Platter
- Creative and customizable: every monster can have a different face or pose.
- Mostly no-bake: prepared brownies and cookies keep the project simple.
- Perfect for parties: one platter offers several bite-size treats for guests to choose from.
- Fun family activity: children can help add candy eyes and decorations with adult supervision.
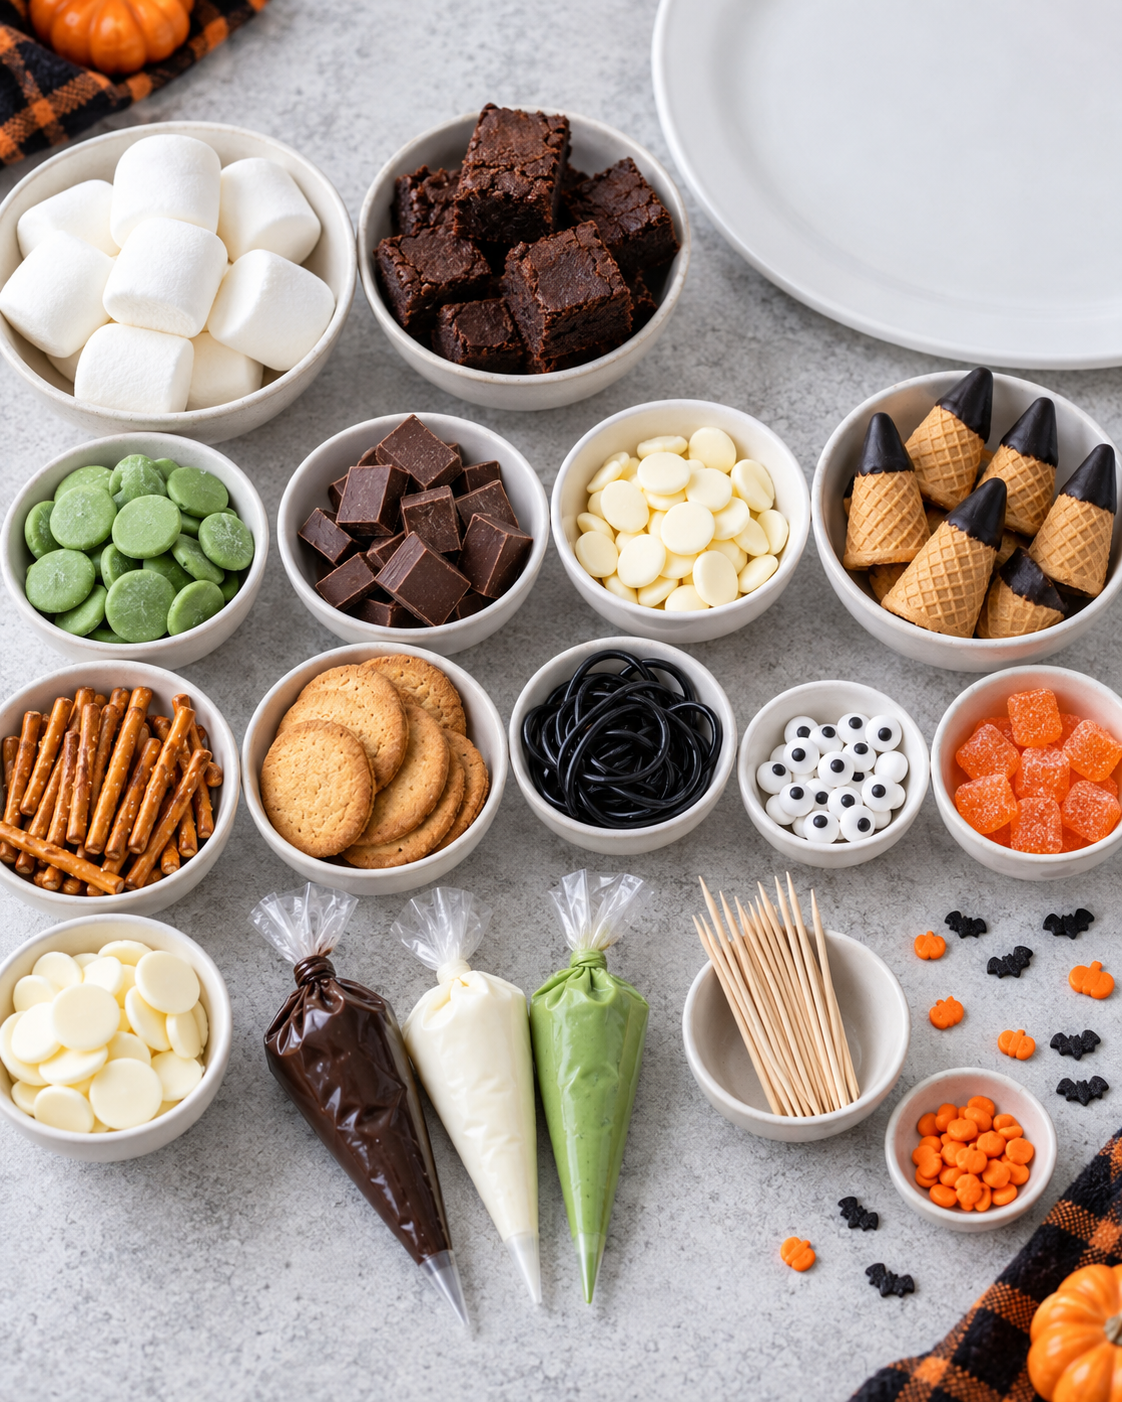
Ingredients
- 18 large marshmallows
- 6 brownie cubes, about 1 1/2 inches each
- 6 green square cookies or small matcha cookie bars
- 10 round sandwich cookies
- 6 pretzel twists
- 12 thin pretzel sticks
- 4 mini waffle cones
- 12 small chocolate candy bars or chocolate squares
- 10 ounces white candy melts
- 10 ounces milk or dark chocolate, melted
- 6 ounces green candy melts
- 36 edible candy eyes
- Black decorating gel or 2 ounces dark chocolate in a fine piping bag
- Black licorice laces, cut into short pieces
- Orange gummy candies or orange sugar-coated candy pieces
- 12 wooden toothpicks or short skewers
- Orange pumpkin and black bat sprinkles, optional
How to Make the Halloween Treat Characters
1. Prepare the Decorations
Melt the white, dark, and green candy melts separately according to the package directions. Transfer a little dark chocolate to a fine piping bag for faces and bones. Line a tray with parchment paper and arrange all bases, marshmallows, brownies, cookies, pretzels, candy eyes, and licorice pieces nearby before assembling.
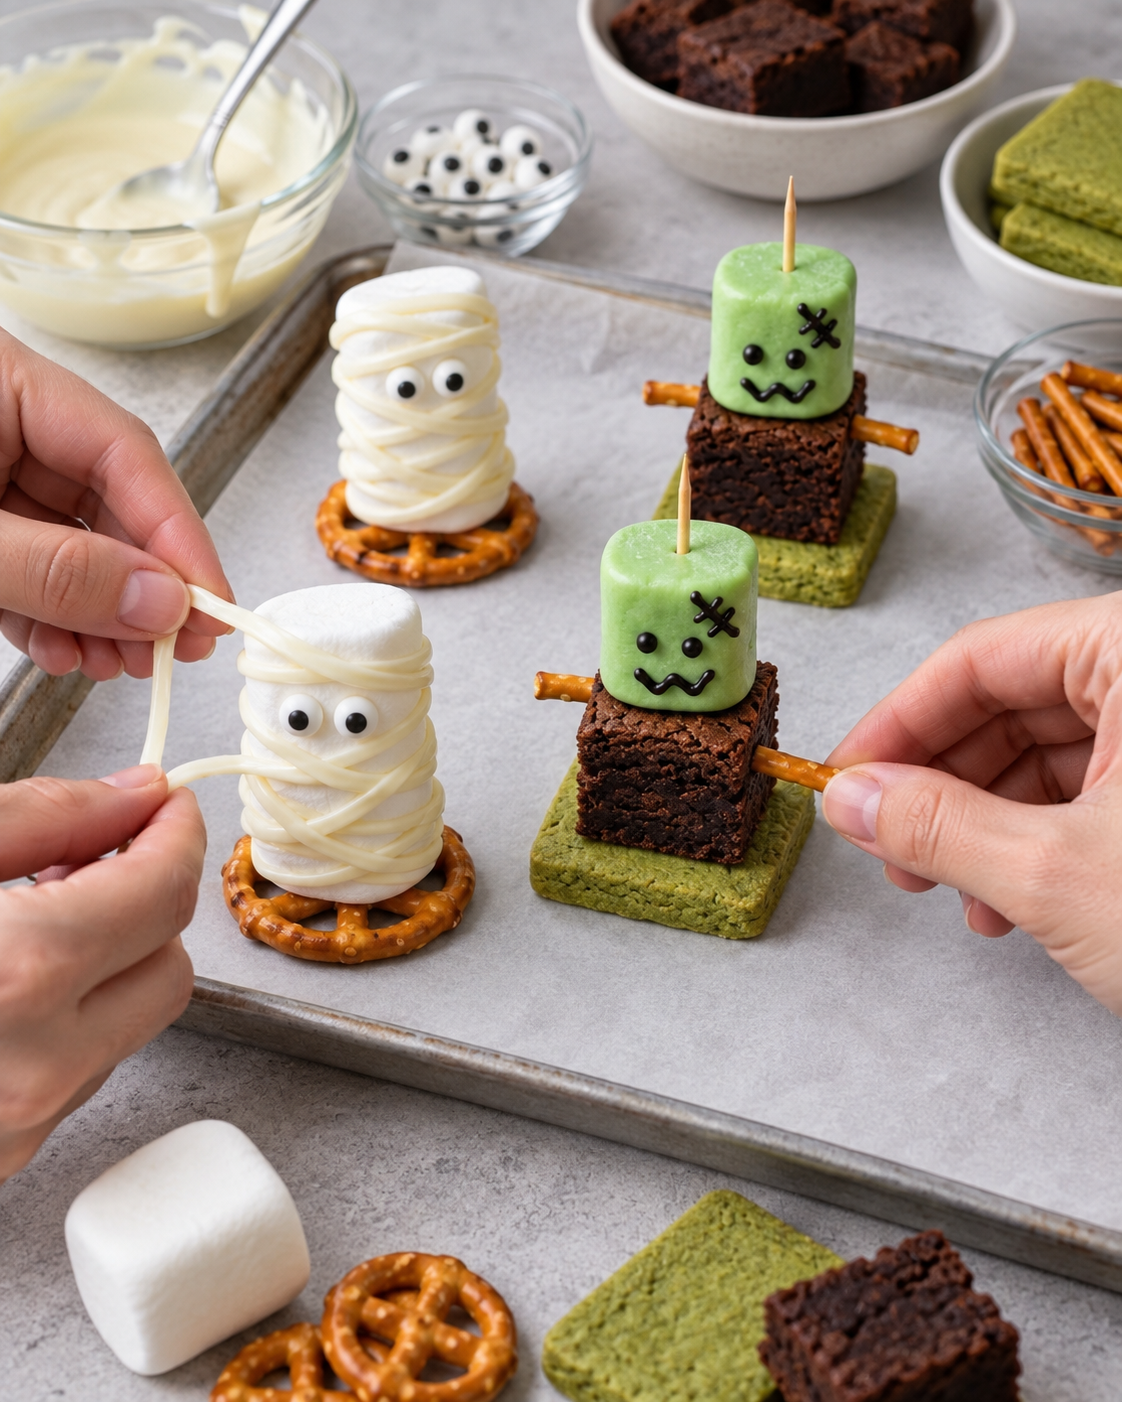
2. Make the Marshmallow Mummies
Place a large marshmallow upright on a pretzel twist. Attach two candy eyes with a small dab of white coating. Drizzle thin lines of white candy coating back and forth around the marshmallow, leaving the eyes visible. Chill until the mummy bandages are firm.
3. Build the Brownie Frankensteins
Place a green square cookie on the tray and stack a brownie cube on top. Dip the end of a marshmallow into melted green candy coating, allow the excess to drip away, and place it on the brownie. Add candy eyes, pipe a stitched mouth and scar, and insert a pretzel-stick arm into each side. A short wooden pick through the center can help secure the layers.
4. Assemble the Chocolate Witches
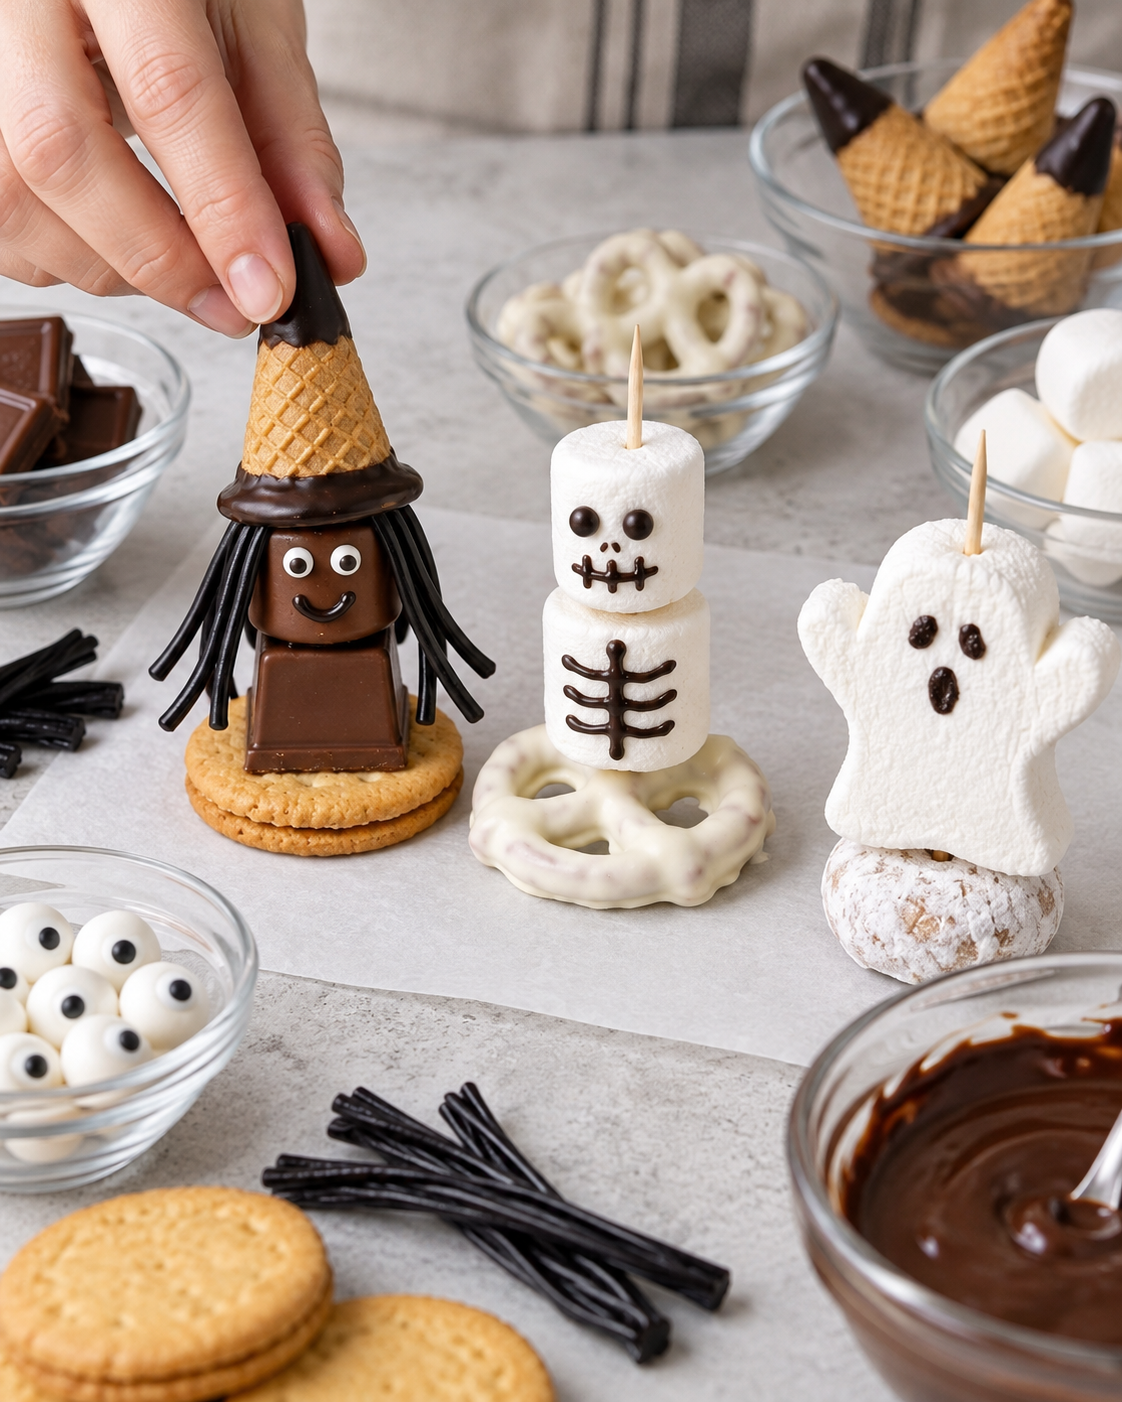
Set a chocolate square upright on a round cookie base, then attach a chocolate-covered marshmallow or candy piece for the head. Press on candy eyes and pipe a smile. Add short black licorice pieces around the head for hair. Dip the rim and pointed tip of a mini waffle cone in dark chocolate, let it set briefly, and place it on top as the witch hat.
5. Create Skeletons and Friendly Ghosts
For each skeleton, stack two white marshmallows on a white-chocolate-covered pretzel or cookie base. Pipe a skull face on the top marshmallow and ribs on the lower one. For the ghosts, gently flatten or trim a marshmallow into a wavy ghost shape, then pipe two eyes and an oval mouth. Set each ghost on a powdered doughnut hole or round cookie for stability.
6. Arrange the Platter
Let every character set completely before moving it. Arrange the taller treats toward the back and center, then place the mummies and ghosts around the edge. Fill small gaps with orange candy pieces, pumpkin sprinkles, and black bat sprinkles. Keep enough space between the characters so guests can lift them easily.
Helpful Tips
- Keep melted coating warm and fluid, but not hot enough to melt the marshmallows.
- Use chocolate like glue and allow each joint to set before adding the next piece.
- Trim licorice laces with clean kitchen scissors for neat witch hair.
- Prepare the brownies and cookie bases one day ahead, then decorate on serving day.
- Remove every wooden pick before eating and supervise young children around toothpicks.
Halloween Dessert Character Platter Recipe Card
Prep time: 45 minutes
Chill time: 20 minutes
Total time: 1 hour 5 minutes
Yield: 12–16 character treats
Category: Halloween Desserts
Method: No-Bake Assembly
Ingredients
- 18 large marshmallows
- 6 brownie cubes and 6 green cookie squares
- 10 round cookies, 6 pretzel twists, and 12 pretzel sticks
- 4 mini waffle cones and 12 chocolate pieces
- 10 ounces white candy melts, 10 ounces dark chocolate, and 6 ounces green candy melts
- 36 candy eyes, black decorating gel, licorice laces, and orange candies
- Optional Halloween sprinkles
Instructions
- Melt the coatings and line a tray with parchment.
- Make marshmallow mummies with white chocolate bandages and candy eyes.
- Stack green marshmallow heads, brownies, and green cookies to create Frankensteins.
- Build chocolate witches on cookie bases and add dipped waffle-cone hats.
- Pipe skeleton details on stacked marshmallows and shape simple white ghosts.
- Chill until firm, arrange on a large platter, and add Halloween sprinkles.
Safety: Remove toothpicks or skewers before serving the treats to children.
Frequently Asked Questions
Can I make this Halloween dessert platter ahead?
Yes. Assemble and decorate the characters up to one day ahead. Store them in a single layer in an airtight container at cool room temperature. Arrange the platter shortly before serving.
What can I use instead of candy melts?
White, milk, and dark baking chocolate work well. Tint white chocolate green only with oil-based candy color, because water-based coloring can make melted chocolate seize.
How do I transport the finished platter?
Transport the characters in a shallow container lined with parchment, then arrange them on the platter at your destination. This prevents the tall figures from tipping over during the trip.
This cheerful monster lineup delivers plenty of spooky personality without being too scary, making it a memorable centerpiece for kids and adults alike.