
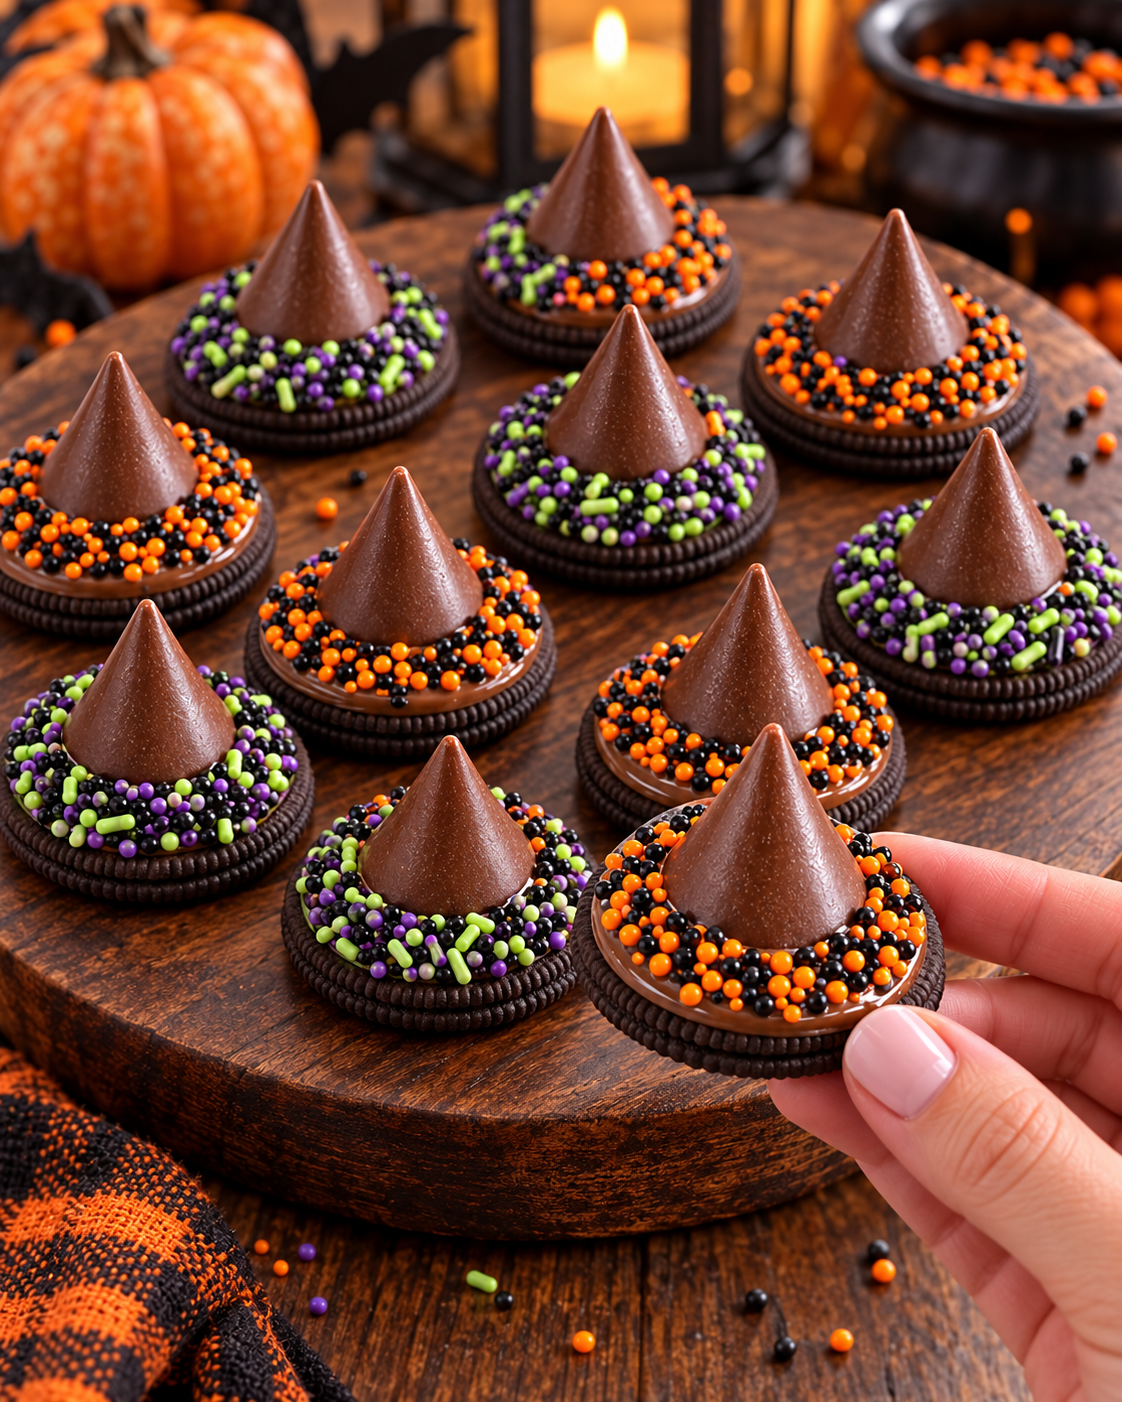
Chocolate Cookie Witch Hats bring instant Halloween magic to any dessert table. Each one combines a crunchy chocolate sandwich cookie, silky melted milk chocolate, a pointed chocolate candy, and a bright ring of festive sprinkles.
These no-bake Halloween treats are quick enough for a last-minute party and simple enough to make with children. The two sprinkle combinations—orange and black or purple, green, and black—create a playful platter without requiring complicated decorating skills. Once the chocolate sets, the hats are easy to arrange, transport, and share.
Why You’ll Love These Chocolate Cookie Witch Hats
- No oven needed: everything comes together with melted chocolate.
- Fast and beginner-friendly: the decorating technique is easy to repeat.
- Party perfect: the finished hats look festive on a Halloween dessert board.
- Easy to customize: change the sprinkle colors to match your celebration.
- Kid-friendly activity: little helpers can add the candy tops and sprinkles with supervision.
Ingredients
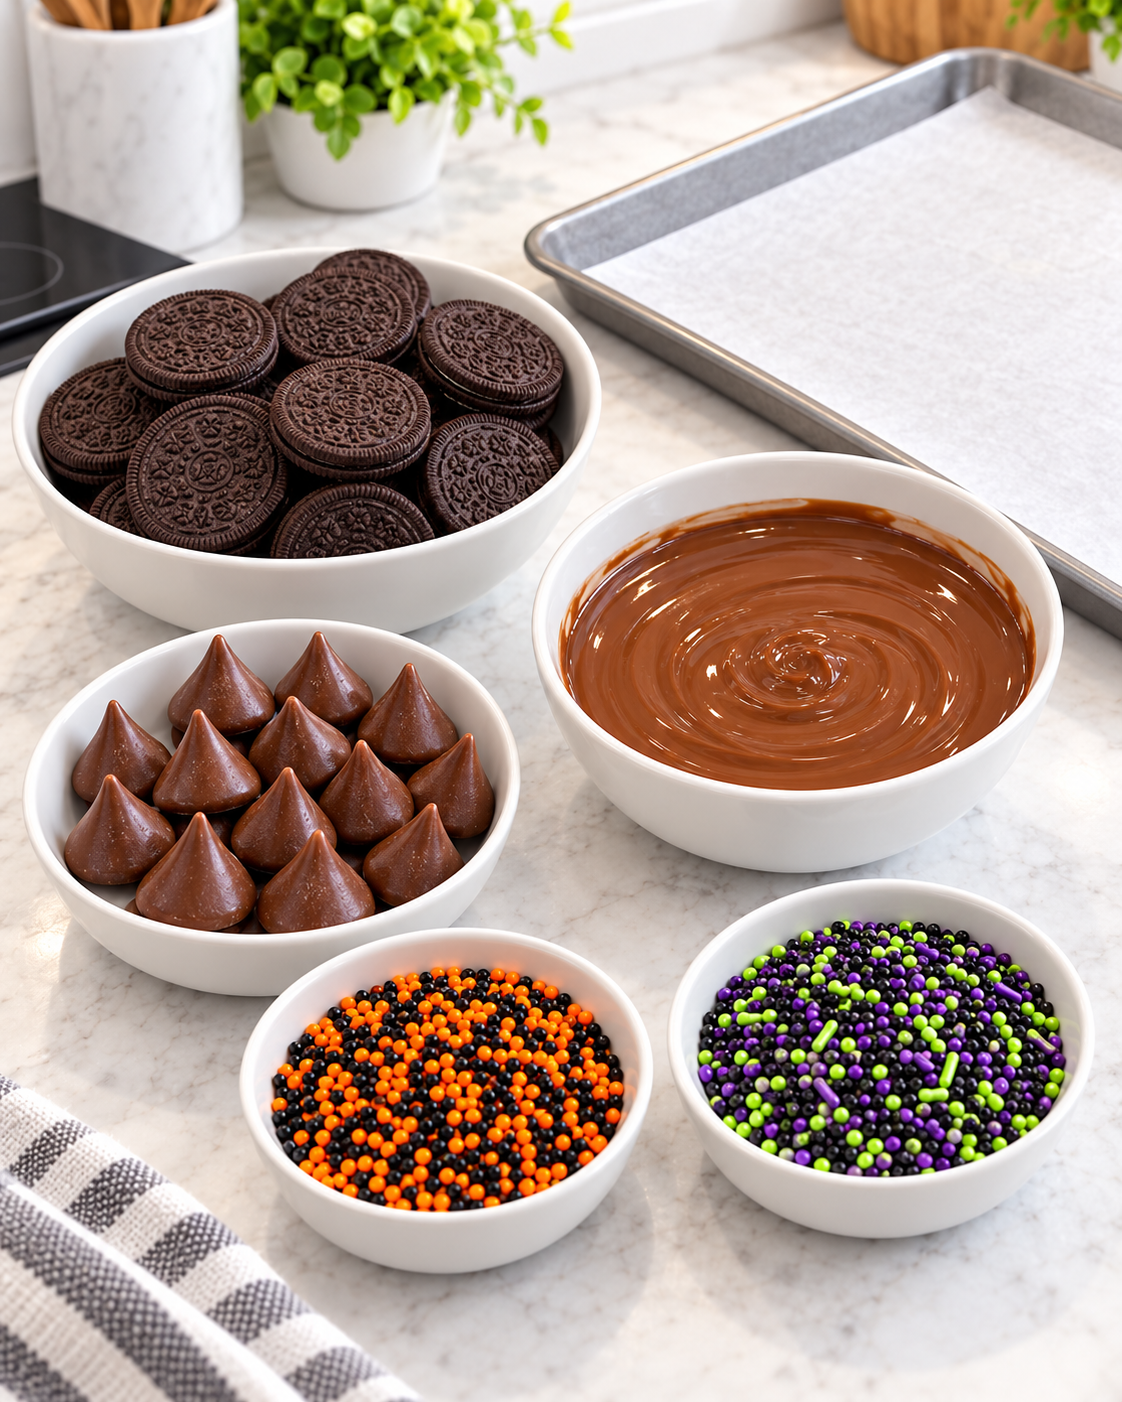
- 12 chocolate sandwich cookies
- 8 ounces milk chocolate, melted
- 12 unwrapped pointed chocolate candies
- 1/3 cup orange-and-black sprinkles
- 1/3 cup purple-green-black sprinkles
How to Make Chocolate Cookie Witch Hats
1. Prepare the tray and decorations
Line a flat tray or baking sheet with parchment paper. Pour the two sprinkle blends into separate shallow bowls so the wet chocolate can easily reach them. Unwrap all twelve pointed chocolate candies before dipping the cookies; the chocolate begins to set quickly, so having every ingredient ready makes assembly much smoother.
2. Dip the cookies in melted chocolate
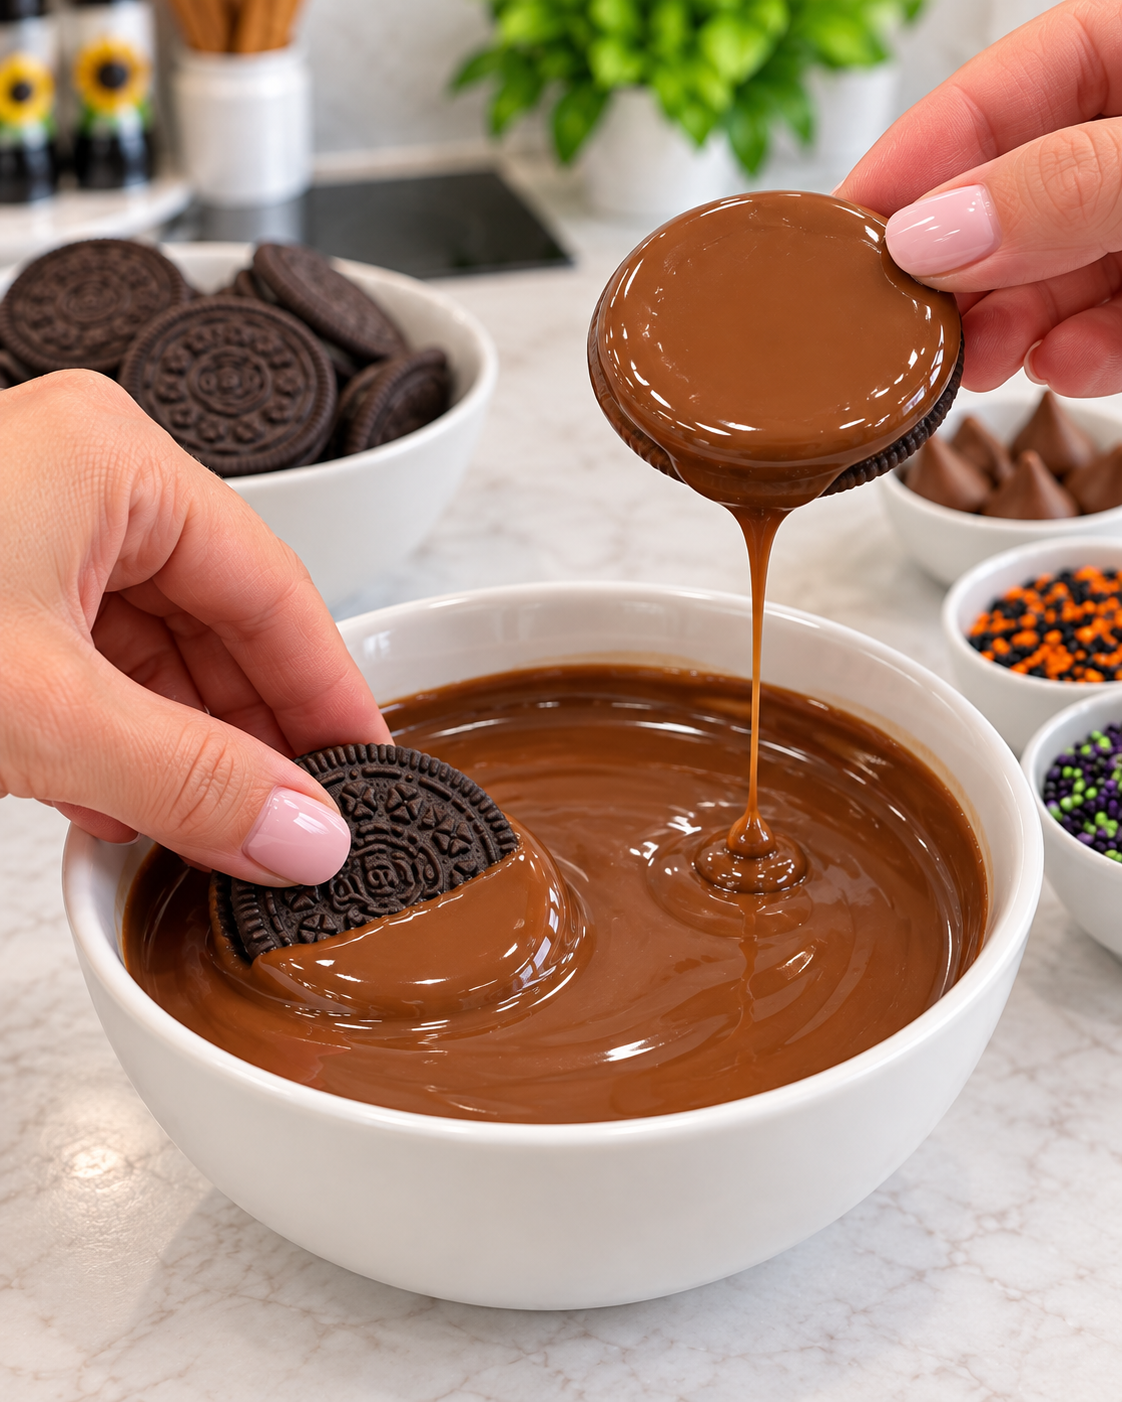
Hold one sandwich cookie by its edge and dip only the top face into the melted milk chocolate. Tilt or rotate it gently so the surface is coated evenly. Lift the cookie over the bowl and let the excess chocolate drip back for a few seconds. The coating should be smooth and generous enough to hold the candy point, but it should not run down the sides.
3. Add the pointed chocolate candy
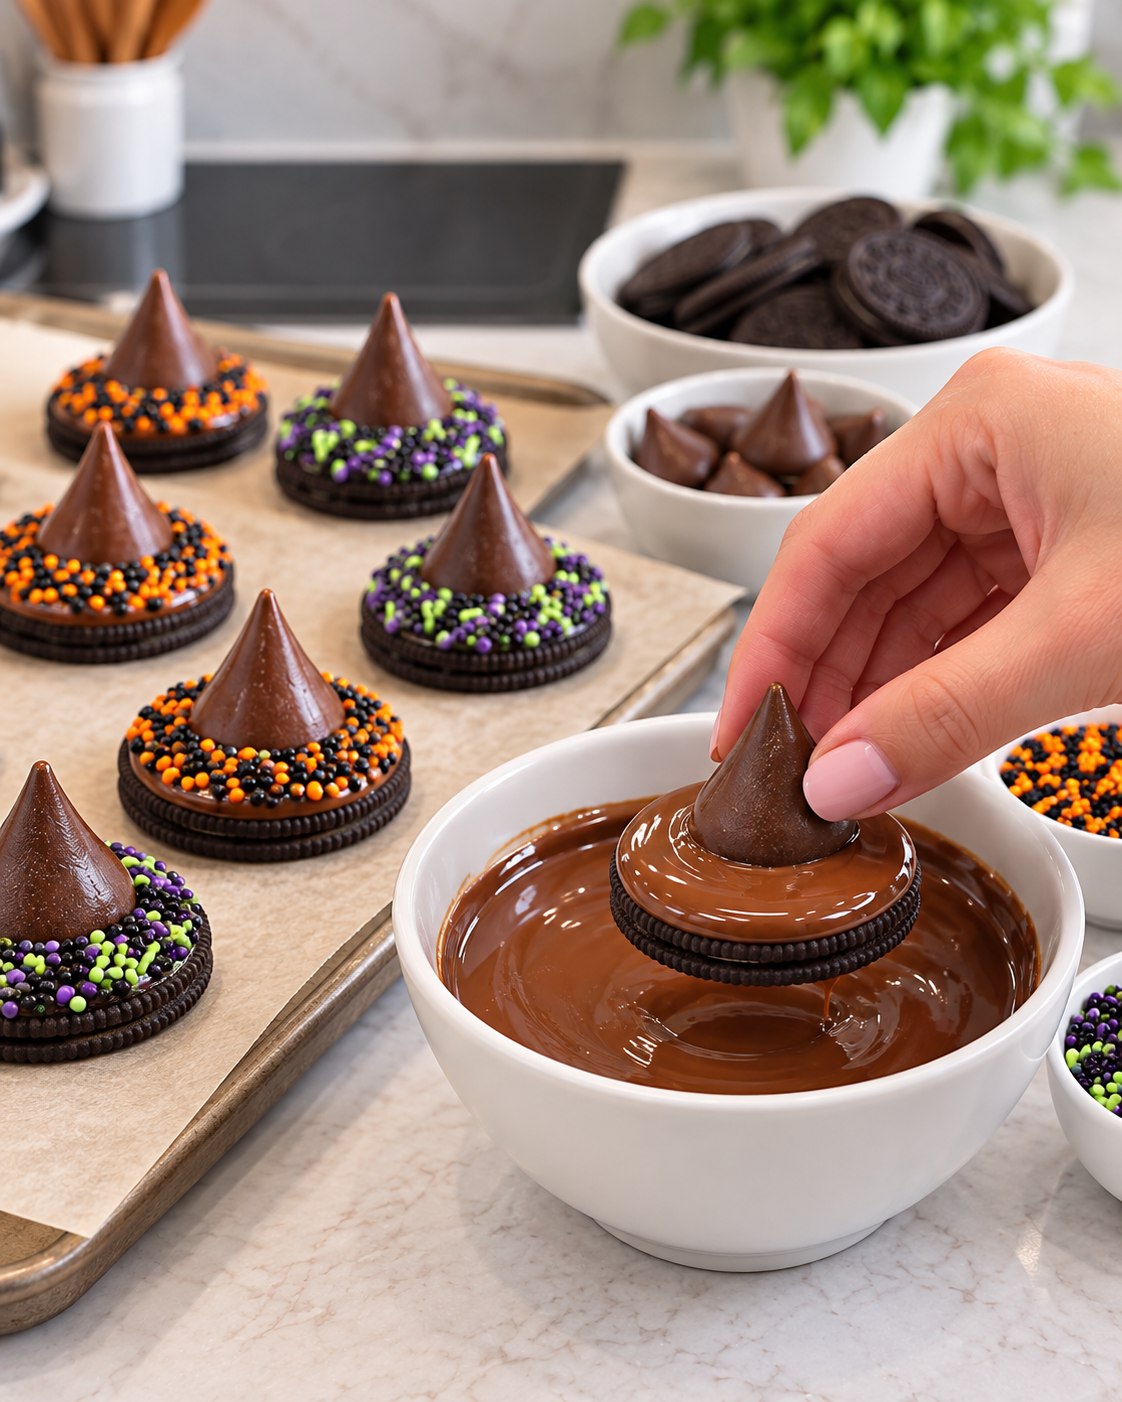
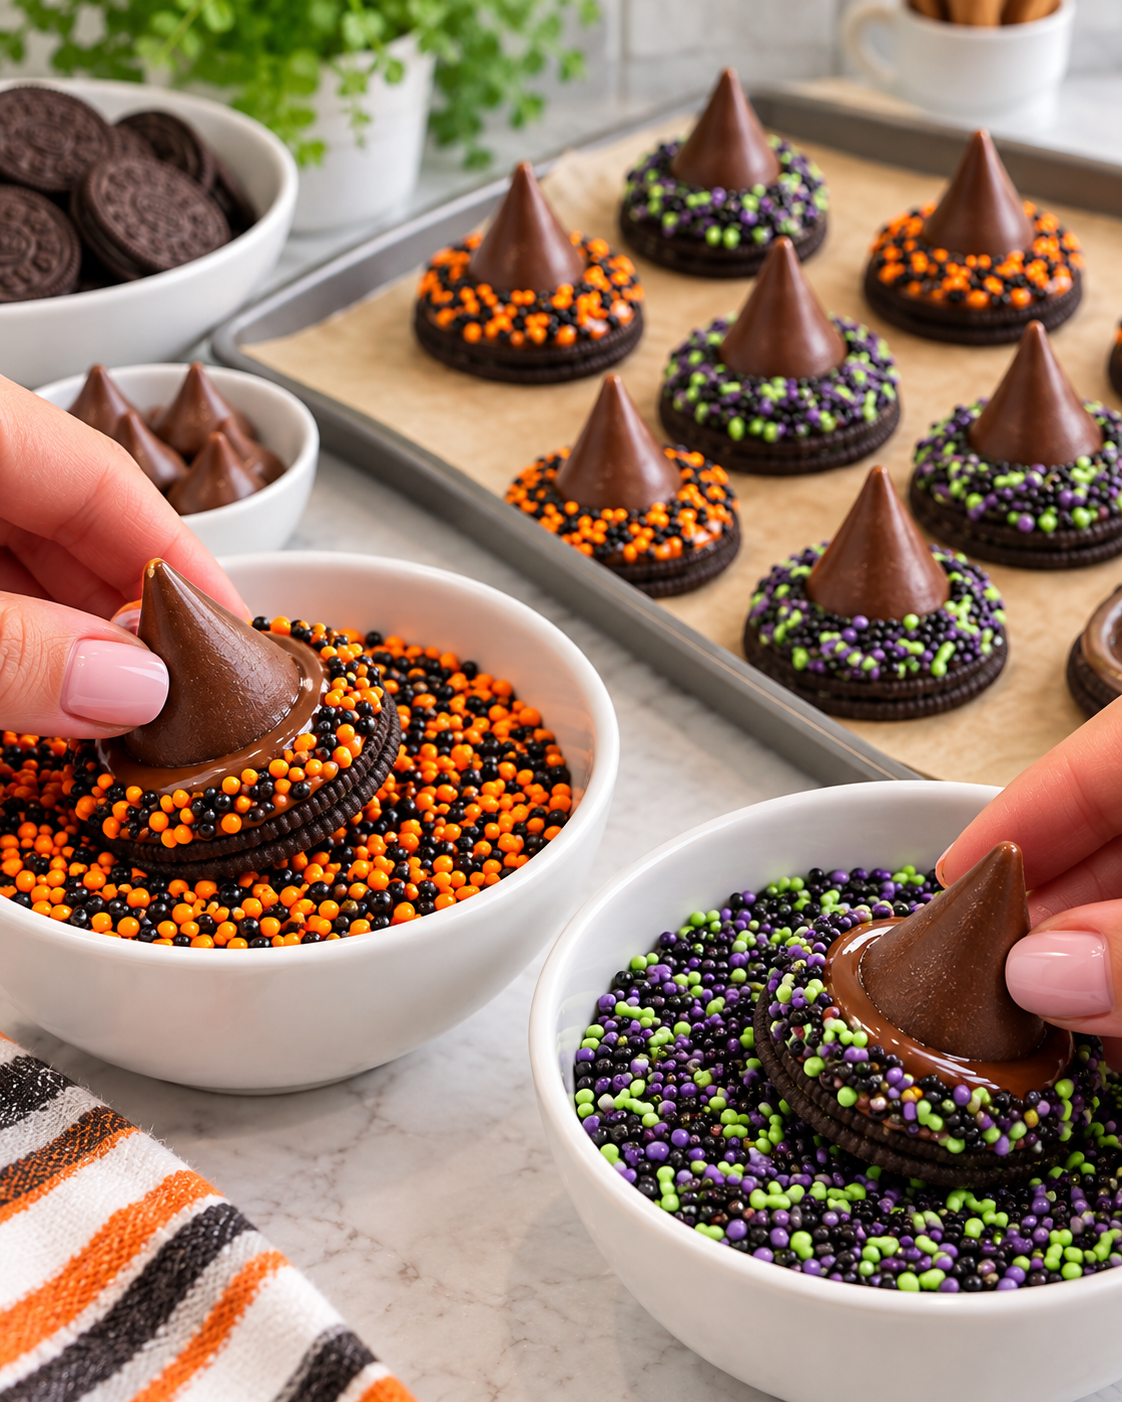
While the coating is still wet, press one pointed chocolate candy upright into the center. Apply light, steady pressure so it sits securely without crushing the cookie. The melted chocolate around the base becomes the hatband and acts as the glue that holds the candy in place.
4. Coat the hatband with sprinkles
Hold the cookie carefully and dip the exposed ring of wet chocolate into one sprinkle blend. Gently rotate the hat until the ring is fully decorated. Alternate between orange-and-black and purple-green-black sprinkles for a colorful assortment. Place every finished hat upright on the parchment-lined tray.
5. Let the chocolate set
Leave the witch hats at room temperature until the chocolate is completely firm. If your kitchen is warm or you need them quickly, chill the tray for about 10–15 minutes. Avoid leaving them in the refrigerator too long, as condensation can make the cookie surface and sprinkles look wet.
Tips for Neat, Stable Witch Hats
- Melt chocolate gently. Heat it in short intervals and stir often to prevent scorching.
- Keep the cookie level. This stops the candy point from sliding while the coating sets.
- Work one at a time. Add the candy and sprinkles before moving to the next cookie.
- Use shallow bowls. They make it easier to decorate only the wet chocolate ring.
- Choose crisp cookies. Broken or softened cookies are more difficult to dip cleanly.
Chocolate Cookie Witch Hats Recipe Card
Prep: 20 minutes | Set: 15 minutes | Total: 35 minutes
Yield: 12 cookie witch hats
Ingredients
- 12 chocolate sandwich cookies
- 8 ounces melted milk chocolate
- 12 pointed chocolate candies
- 1/3 cup orange-and-black sprinkles
- 1/3 cup purple-green-black sprinkles
Quick Instructions
- Line a tray with parchment and place the sprinkles in shallow bowls.
- Dip the top face of each cookie in melted chocolate.
- Let excess chocolate drip into the bowl.
- Press a pointed chocolate candy upright in the center.
- Roll the wet chocolate ring in sprinkles.
- Set at room temperature or chill briefly until firm.
Make Ahead and Storage
You can make these treats up to three days ahead. Once the chocolate is firm, arrange the hats in a single layer inside an airtight container, placing parchment between layers if necessary. Store them in a cool, dry place. Refrigerate only when your kitchen is very warm, and let the container come to room temperature before opening it to reduce condensation.
Frequently Asked Questions
Can I use semisweet or dark chocolate?
Yes. Semisweet and dark chocolate both work well and provide a less-sweet contrast to the cookies and candy. Use a chocolate that melts smoothly.
Why is my pointed candy sliding?
The chocolate may be too warm or too thin. Let it cool for a minute, then try again and keep the cookie level until the candy begins to hold.
Can children make these?
Yes, with adult supervision. An adult should melt and handle the warm chocolate, while children can press on the candy points and decorate the hatbands with sprinkles.