
Want to serve something truly spook-tacular this October? These Halloween-themed cake pops and treats are as delicious as they are festive. From grinning jack-o’-lanterns to skeleton faces and candy-coated mummies, they’ll delight kids and adults alike. Perfect for parties, trick-or-treat events, or a fun weekend baking project, this recipe combines moist cake with colorful chocolate coatings for a bite-sized dessert that’s frightfully fun.
At a Glance
- Servings: 20–24 cake pops
- Prep Time: 30 minutes
- Chill Time: 1 hour
- Decorating Time: 30 minutes
- Total Time: About 2 hours
- Difficulty: Moderate
- Estimated Cost: $12–18
Table of Contents
Ingredients
For the Cake Pops:
- 1 baked 9×13-inch (23×33 cm) chocolate or vanilla cake (homemade or box mix)
- 1 cup (120 g) frosting (buttercream or cream cheese style)
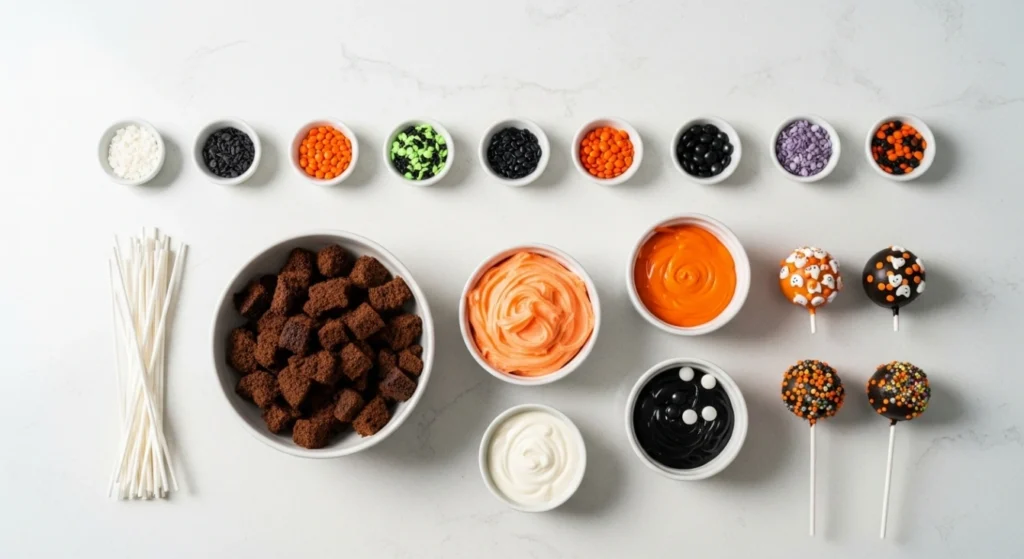
For the Coating & Decorations:
- 2 cups (350 g) white chocolate or candy melts
- 2 cups (350 g) orange candy melts
- 2 cups (350 g) black candy melts
- Assorted sprinkles (orange, black, white)
- Edible candy eyes
- Black fondant or edible markers for faces
- Lollipop sticks
Notes & Swaps:
- Use gluten-free cake mix for a GF version.
- Swap frosting for dairy-free alternatives if needed.
- Candy melts are easiest, but you can temper real chocolate for a shinier finish.
Step-by-Step Instructions
- Prepare the Cake Base: Crumble the cooled cake into fine crumbs in a large mixing bowl.
- Mix with Frosting: Add frosting gradually until the mixture holds together like dough. It should be moist but not sticky.
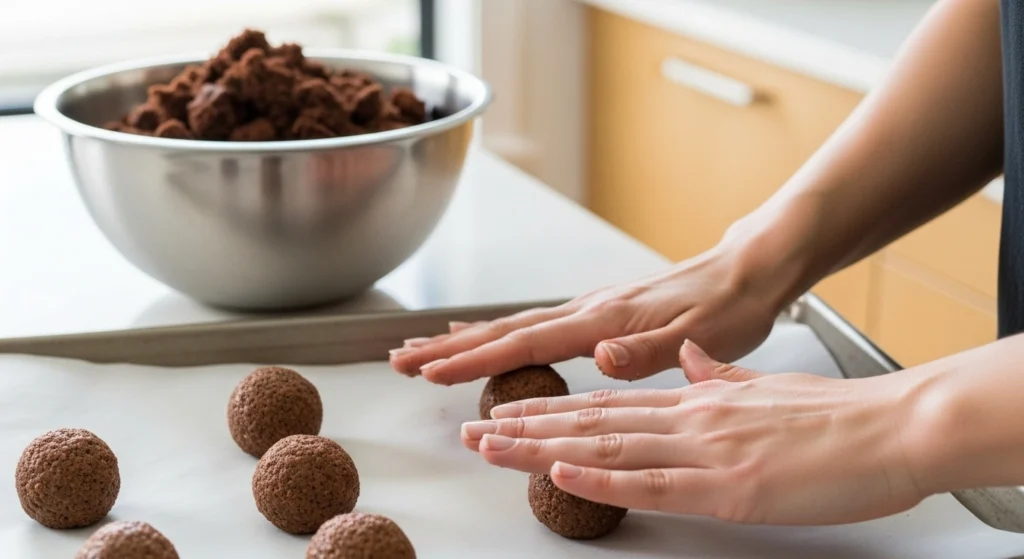
- Shape Cake Balls: Roll into 1 ½-inch (4 cm) balls and place on a parchment-lined tray. Chill for 30–60 minutes.
- Attach Sticks: Dip each lollipop stick tip into melted candy melts, then insert halfway into each cake ball. This helps secure them.
- Coat Cake Pops: Dip each pop into melted candy coating, gently swirling to cover. Let excess drip off before placing upright in a stand or foam block.
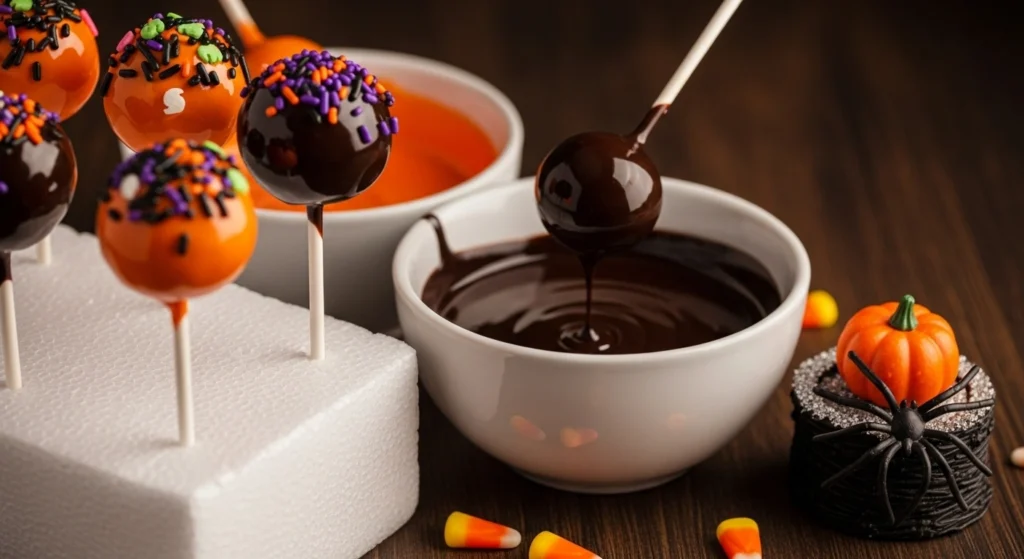
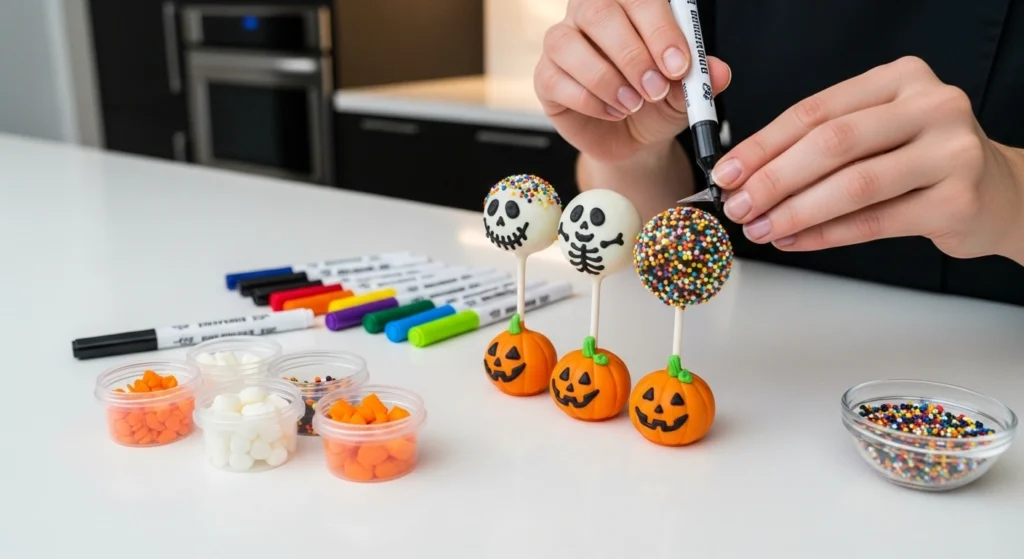
- Decorate: While coating is still wet, add sprinkles or edible eyes. Once set, use fondant cutouts or edible markers to draw pumpkins, skeletons, bats, and mummy faces.
- Set & Serve: Allow cake pops to fully harden at room temperature before serving.
Pro Tips & Variations
- Freeze cake balls for 15 minutes before dipping for easier coating.
- Create “mummy” pops by drizzling white chocolate over a base layer.
- Use orange and black stripes for a festive but simple option.
- Try different flavors like red velvet or pumpkin spice for variety.
Serving Suggestions

- Display cake pops upright in a Halloween-themed stand or a carved pumpkin.
- Serve alongside hot chocolate or apple cider.
- Pair with candy corn, gummy worms, or other spooky treats for a party platter.
Storage & Reheating
- Store cake pops in an airtight container at room temperature for up to 3 days.
- Refrigerate up to 1 week (bring to room temp before serving).
- Freeze undecorated pops for up to 2 months; dip and decorate after thawing.
Troubleshooting
- Cake balls falling off sticks? Chill longer before dipping, and make sure to dip stick tips in melted coating first.
- Coating cracking? Cake balls may be too cold let them sit a few minutes before dipping.
- Uneven coating? Thin candy melts with a teaspoon of vegetable shortening.