
Halloween brownies that are fudgy, chocolatey, and decked out in spooky-cute toppings? Yes, please. These easy Halloween brownies are perfect for parties, bake sales, and kid-friendly decorating stations no fancy skills required, just fun themes like mummy stripes, spiderwebs, and mini graveyards.
At a Glance
- Servings: 16 brownies (9×13-inch pan)
- Prep Time: 20 minutes (plus 30–45 minutes cooling)
- Cook Time: 22–28 minutes
- Total Time: 1 hour 15 minutes
- Difficulty: Easy
- Estimated Cost: $10–$14 (decorations vary)
Table of Contents
Ingredients
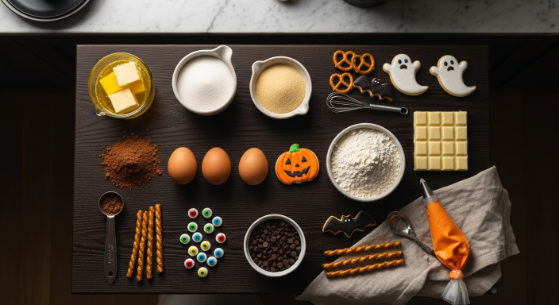
For Fudgy Brownies
- 1 cup (2 sticks/226 g) unsalted butter, melted and slightly cooled (use plant-based butter for dairy-free)
- 2 cups (400 g) granulated sugar
- 3 large eggs + 1 egg yolk, room temperature (for vegan: 4 tbsp ground flax + 10 tbsp water, rested 10 minutes)
- 1/3 cup (80 ml) neutral oil (canola/avocado)
- 1 tbsp alcohol-free vanilla bean paste or vanilla flavor (avoid extract with alcohol)
- 1 cup (120 g) all-purpose flour (use 1:1 gluten-free baking blend for GF)
- 3/4 cup (75 g) unsweetened cocoa powder (natural or Dutch-processed)
- 1/2 tsp fine sea salt
- 1/4 tsp baking powder (optional; skip for extra fudgy)
- 1 cup (170 g) semisweet chocolate chips (dairy-free if needed)
Spooky Decorations (mix & match)
- 6 oz (170 g) white chocolate chips or white candy melts (for mummy stripes/webs; dairy-free if needed)
- 1 cup orange-tinted buttercream or royal icing (or vanilla icing + orange gel color)
- Candy eyeballs (use vegan/gelatin-free options if desired) or mini white chocolate chips as “eyes”
- Black gel icing or melted dark chocolate for details
- 8–10 chocolate sandwich cookies, crushed (for “graveyard dirt”)
- Tombstone cookies (e.g., Milano-style or rectangular butter cookies; GF if needed)
- Mini peanut butter cups or chocolate buttons for spiders (peanut-free alternative: Rolos or chocolate caramels)
- Thin pretzel sticks or black licorice laces for spider legs (GF pretzels available)
- Halloween sprinkles (check for vegan/GF if needed)
Shortcut Option
- 1 box (18–20 oz) brownie mix + ingredients on the box, then decorate as below.
Step-by-Step Instructions
- Prep the pan & oven. Preheat to 350°F (175°C). Line a 9×13-inch metal pan with parchment, leaving overhang “handles.” Lightly grease the parchment.
- Whisk wet ingredients. In a large bowl, whisk melted butter, sugar, and oil until thick and glossy, 1 minute. Whisk in eggs and yolk one at a time (or flax mixture), then whisk in alcohol-free vanilla. Whisking well helps create that shiny, crackly top.
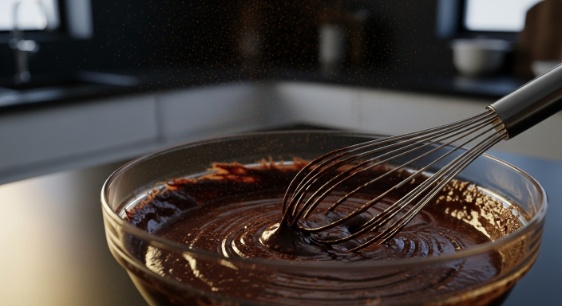
- Fold in dry ingredients. Sift flour, cocoa, salt, and optional baking powder directly into the bowl. Fold gently until no dry streaks remain. Fold in chocolate chips.
- Bake. Spread batter evenly in pan (it’s thick). Bake 22–28 minutes, until the center is just set and a toothpick comes out with a few moist crumbs (not wet batter).
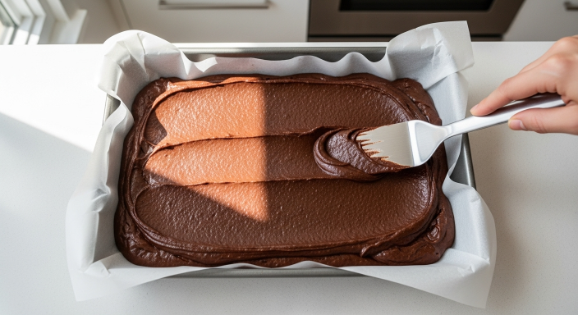
- Cool completely. Cool in the pan on a rack 30–45 minutes. Lift out with the parchment and cool another 10 minutes before decorating.
- Make spooky designs.
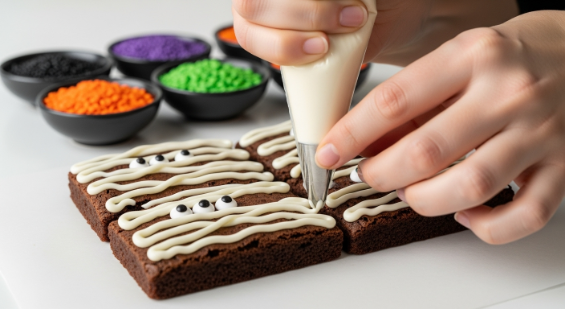
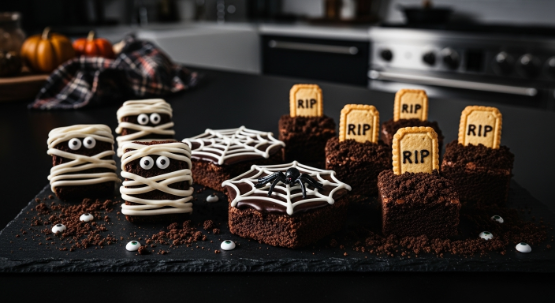
- Mummy Brownies: Melt white chocolate/candy melts in a microwave-safe bowl (50% power, 20–30 sec bursts). Drizzle criss-cross “bandages” over cut brownies and add candy eyes.
- Spiderweb Brownies: Pipe concentric circles of white icing or melted white chocolate over the slab; drag a toothpick from center to edges to web it out.
- Graveyard Brownies: Frost with orange icing. Sprinkle with crushed cookies for “dirt.” Press a cookie “tombstone” into each square. Add RIP with black gel icing.
- Spiders: Place a mini PB cup or chocolate button as the body; pipe or place pretzel/licorice legs; dot two white chocolate chips or candy eyes.
- Set & serve. Let toppings set 10–15 minutes. Slice into 16 squares (or smaller bites for parties). Boo-tiful!
Pro Tips & Variations
- Crackly tops: Beat the sugar with eggs well (30–60 seconds) before adding dry ingredients.
- Extra fudgy: Skip baking powder and pull brownies when the center is just set.
- Gluten-free: Use a 1:1 GF blend; check decorations for gluten.
- Dairy-free: Plant butter + dairy-free chocolate chips; use dairy-free candy melts.
- Vegan: Flax “eggs,” plant butter/oil, dairy-free chips; choose vegan eyes/sprinkles.
- Flavor boosters: 1–2 tsp instant espresso powder deepens chocolate (optional); a pinch of cinnamon or cayenne adds warm “witchy” vibes.
- Neat cuts: Chill 20 minutes before slicing; wipe knife between cuts.
Serving Suggestions
- Set up a decorate-your-own station for kids: cooled brownies, piping bags, bowls of toppings.
- Pair with apple slices, clementine “pumpkins,” and milk or hot cocoa for a balanced treat board.
- Mix spooky styles on one platter for an eye-catching centerpiece.
Storage & Reheating
- Room Temp: Airtight up to 3–4 days. Keep decorated brownies in a single layer.
- Fridge: Up to 1 week (texture firms; let sit 15 minutes before serving).
- Freeze: Best undecorated up to 2 months. Wrap slab tightly, then bag. Thaw overnight in fridge; decorate after thawing.
- Warm it up: Microwave 10–12 seconds for a gooey bite (avoid melting delicate decorations).
Troubleshooting
- Dry or cakey: Overbaked. Next time, pull at the first sign of set center with moist crumbs on a toothpick.
- No shiny top: Under-mixed eggs/sugar. Whisk longer before adding dry ingredients.
- Sinking center: Pan too small or batter overmixed. Use a 9×13 metal pan and fold gently.
- Seized white chocolate: Water contact or overheated. Melt at 50% power in short bursts; stir often.